If you are not an expert on customizing the WordPress child theme, you can skip this child theme part.
Theme's General Information
- Version: -
- Recent Update: -
- Release Date: 20/11/2017
- Get Premium Support: Send Message
- Theme Created By MD MAHBUB ALAM KHAN & AFM JAMAL UDDIN
- Web Site: https://bluewindlab.net
- Skype: bluewindlab
First of all, thanks a lot for purchasing our theme. We hope you will like the WordPress theme, and it would be great if you can spare a minute to rate it. Finally, If you need any support regarding our theme, please feel free to contact us via our profile page https://themeforest.net/user/essentialwebapps#contact
Requirements
You need at least WordPress version 5.8+ installed for this theme to work properly. It is strongly recommended that you always use the latest stable version of WordPress to ensure all known bugs and security issues are fixed. Other requirements:
- PHP version 7.3 or greater.
- MySQL version 5.0.15 or greater.
Theme Installation
To install a theme, you must first upload the theme files and then activate the theme. The theme files can be uploaded in two ways:
- FTP Upload: Using your FTP client, upload the non-zipped theme folder into the /wp-content/themes/ folder on your server.
- WordPress Upload: Navigate to Appearance >> Themes >> Add New >> Upload. Go to browse, and select the zipped theme folder. Hit "Install Now" and the theme will be uploaded and installed.
Step 01: Go to WP admin dashboard and click on Appearence >> Themes >> Add New.
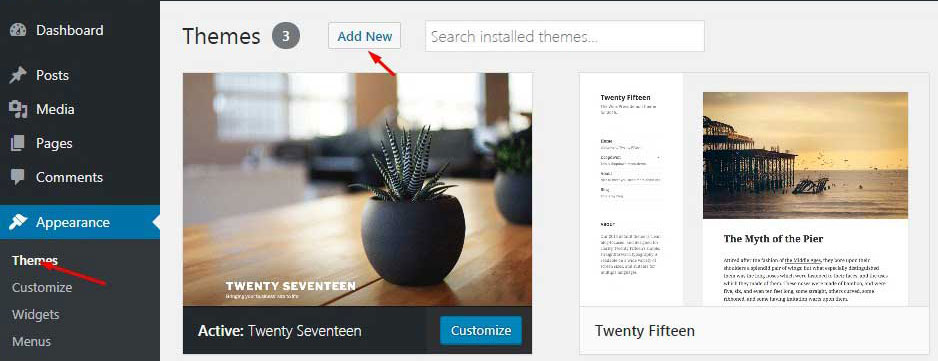
Step 02: Click on Upload Theme.

Step 03: Browse the file petapalozza.zip which you'll have from the download and click on Install Now .

Step 04: Activate the theme.

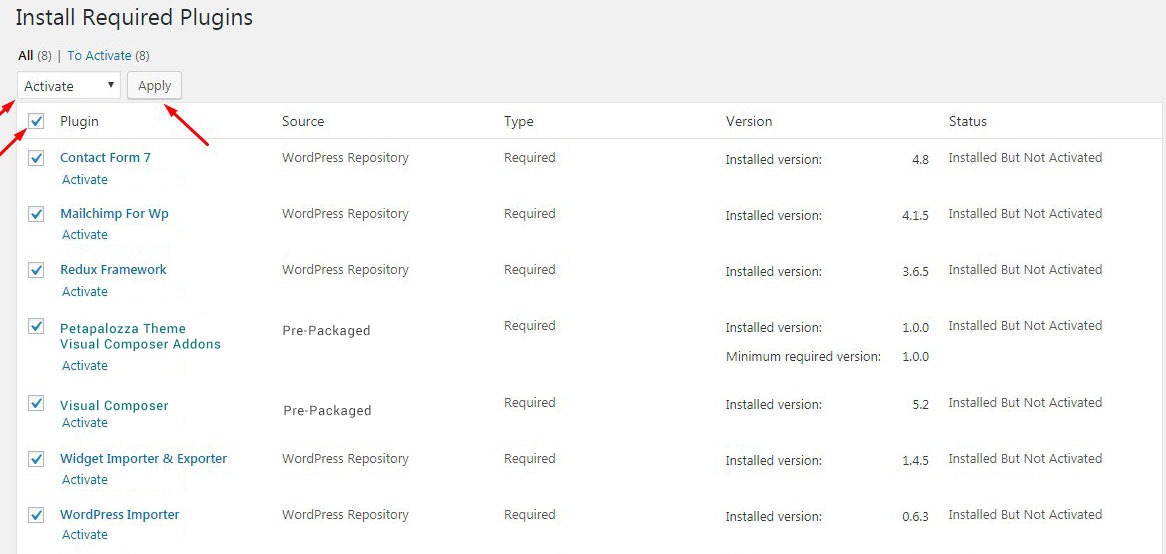
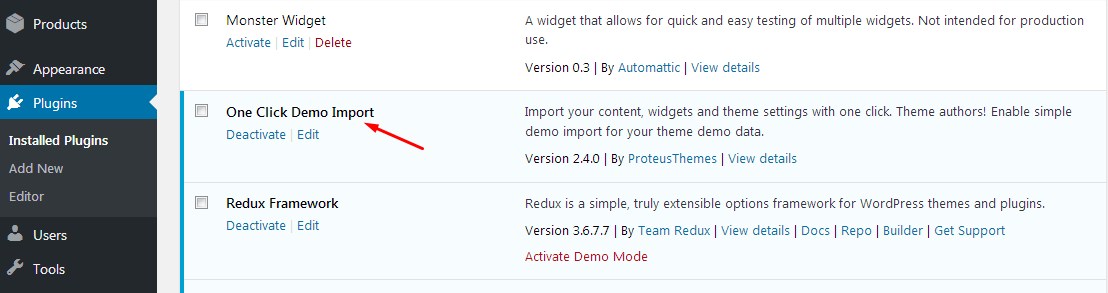
Step 05: Click on Begin Installing Plugins link.

Please install and activate the following pre-packaged plugins:
- One Click Demo Import. (Required, but you can deactivate it after import demo data).
- WPBakery Page Builder. (Required)
- Redux Framework. (Required)
- Petapalozza Theme WPBakery Page Builder Addons. (Required).
- Contact Form 7.(Required)
- Mailchimp For Wp. (Required)
- Woocommerce. (Optional, If you want to run a shop install and activate it).
- Widget Importer & Exporter. (Required, but you can deactivate it after import demo data).
- WordPress Importer. (Required, but you can deactivate it after import demo data).
N.B: All plugins must be installed and activated if you want your site to look exactly like demo.
Step 06: Select the plugins to Install and click Apply.

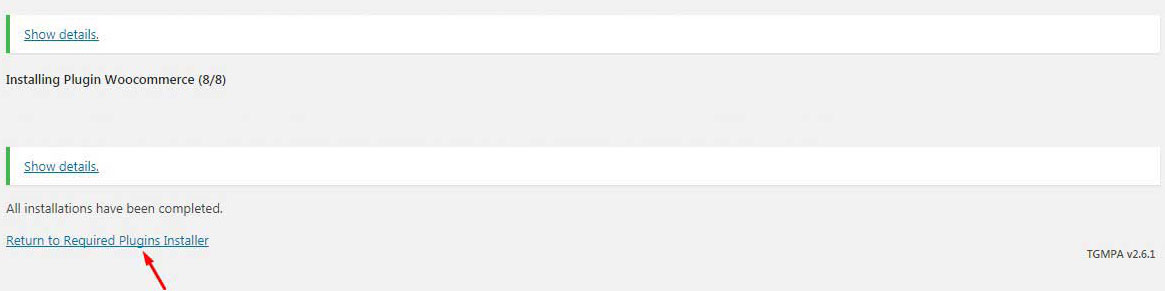
Step 07: After install the plugin click on Return to Required Plugins Installer.
Step 08: Select the plugin to Activate and click Apply.
Step 09: After active the plugin click on Return to the Dashboard.

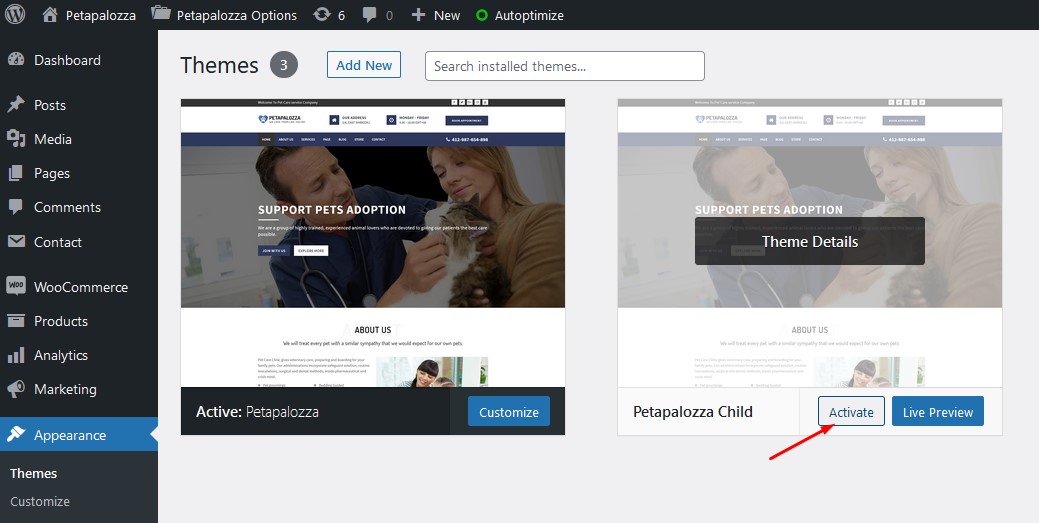
Child Theme Installation
The Installation process of a child theme is similar to the parent WordPress theme. Please note that the A Child theme is often used by the developers who want to override/extend a theme's features or functionalities without changing the parent theme's codes. You will get the child theme zip file inside the theme package.

Output:
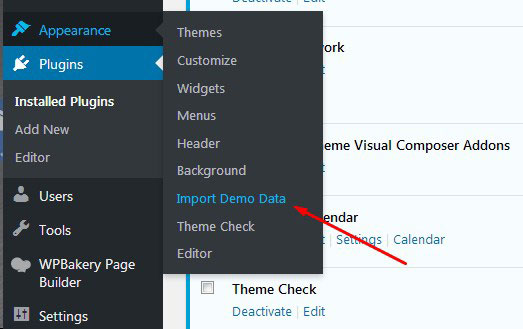
Import Demo Data
Usually, creating a website from the beginning is a time-consuming and challenging process. The theme comes with the most popular 'One Click Demo Installation' feature, which allows you to get the site ready precisely like the theme demo within a few minutes.
Few Important Notes:
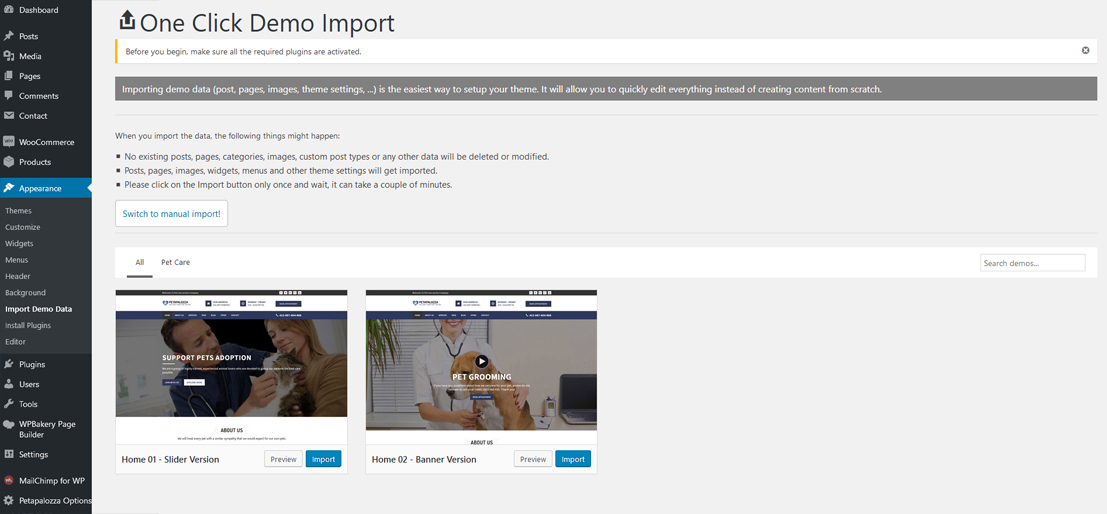
- Make sure that Petapalozza Parent Theme has been installed and activated in your site.
- You're previous data and settings may be removed/modified after importing demo data. So, we highly recommend to import demo data in a fresh WordPress site.
- It may be take bit long time to import all the images and data from our server. So, please keep patience while importing process is running in your site. In general case, It will not take more than 3-5 Min.
- You can deactivate One Click Demo Import plugin after completing import task.
Please follow the steps -
Step 01: Make sure you have installed and activated One Click Demo Import plugin.
Step 02: Go to Appearance >> Import Demo Data page.
Step 03: Click Import Demo Data button. It will take few min to complete import process. So, keep patience until import process completed successfully.
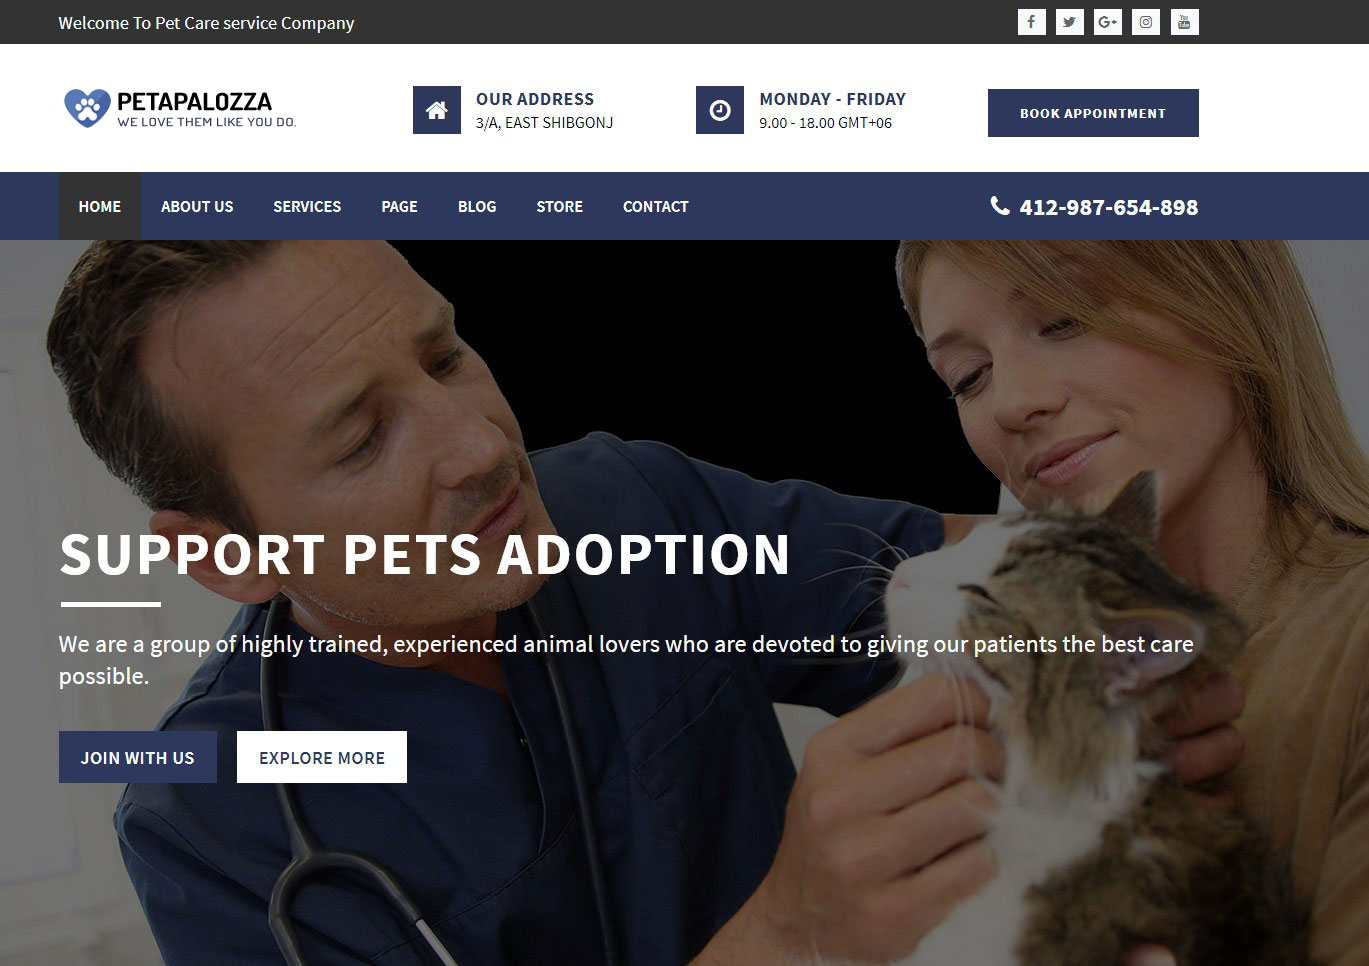
Step 04: Once completed import process successfully, you will get following success message.

Step 05: Check Result -
Theme Options Panel
This theme comes with lots of admin options, Go to Petapalozza Options from the left panel and you'll see all the cool things you'll have to customize to suite your needs.
Add/Change Favicon:
From Admin menu, navigate to
Petapalozza Theme Options >> General
tab. You can add your site favicon in here.
We recommend to upload a favicon which size is
64x64
and file type should be in
png format.
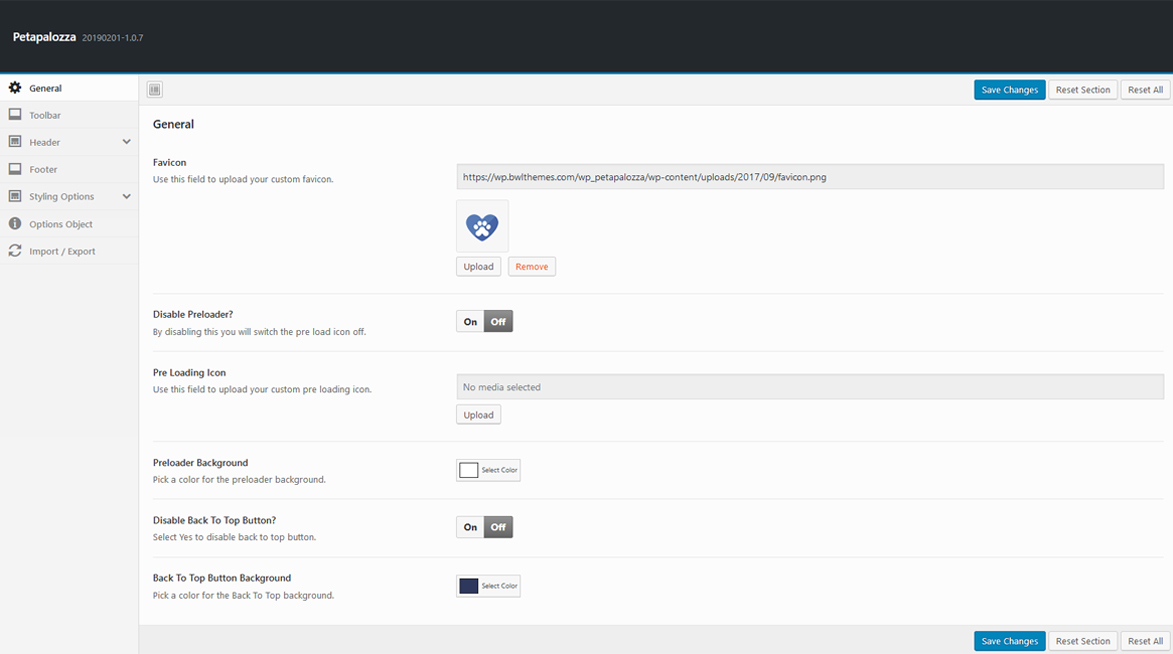
Output:

Tool Bar Customization:
From Admin menu, navigate to
Petapalozza Theme Options >> Toolbar
tab. You can enable/disable toolbar of your site favicon from here.
You can also customize toolbar color, font size, texts and set padding according to your requirement.
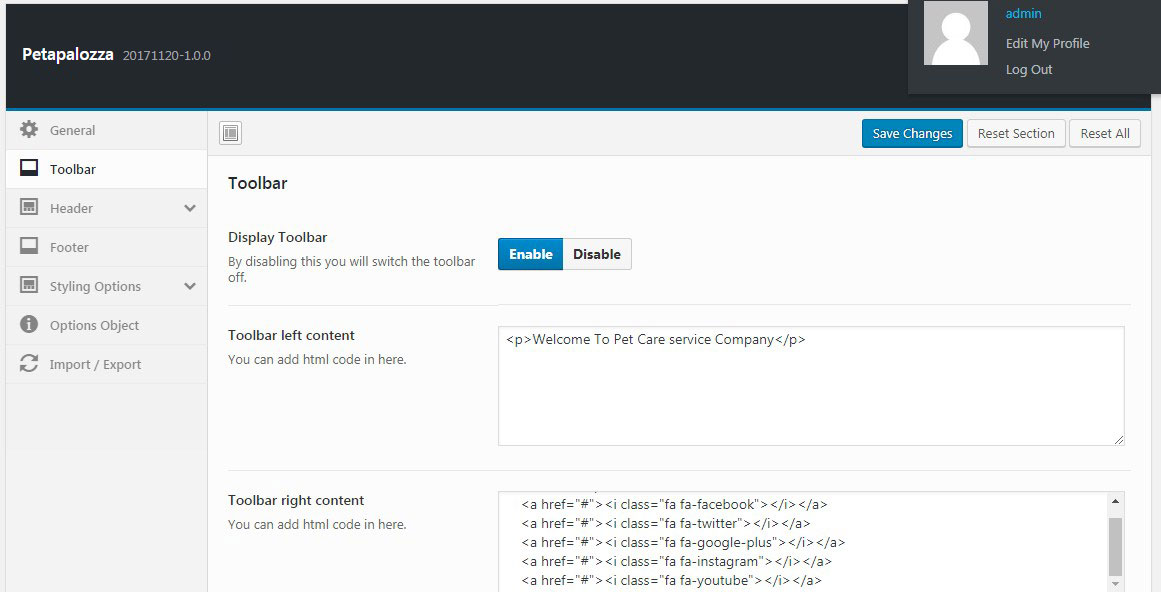
Output:

Customize Menu Color:
From Admin menu, navigate to
Petapalozza Theme Options >> Header >> Navbar
tab.
You can customize menu color, menu item background, menu fonts and set padding/margin according to your requirement.
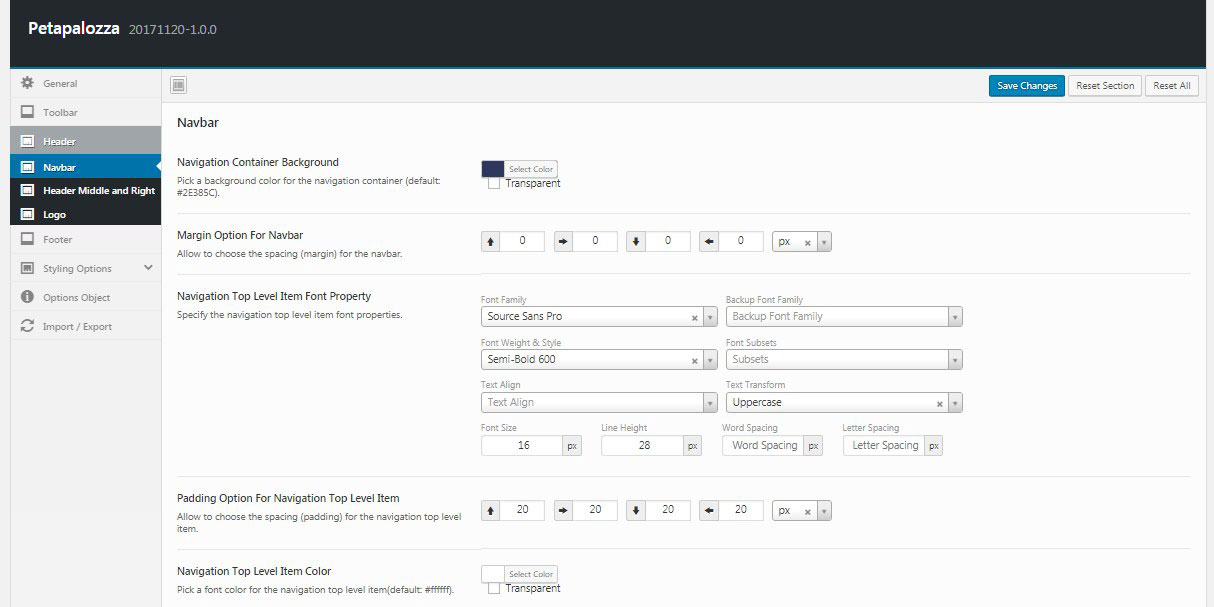
Output:

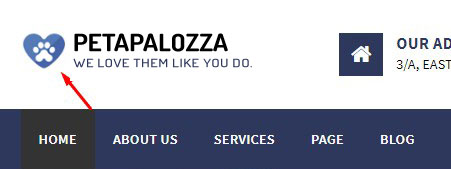
Setup Site Logo:
From Admin menu, navigate to
Petapalozza Theme Options >> Header >> Logo
tab.
You can set custom logo for your site, set text logo and set padding/margin according to your requirement.

Output:
Add Copyright Text:
From Admin menu, navigate to
Petapalozza Theme Options >> Footer
tab.
You can set custom copyright text according to your requirement. You can also disable this copyright text section.
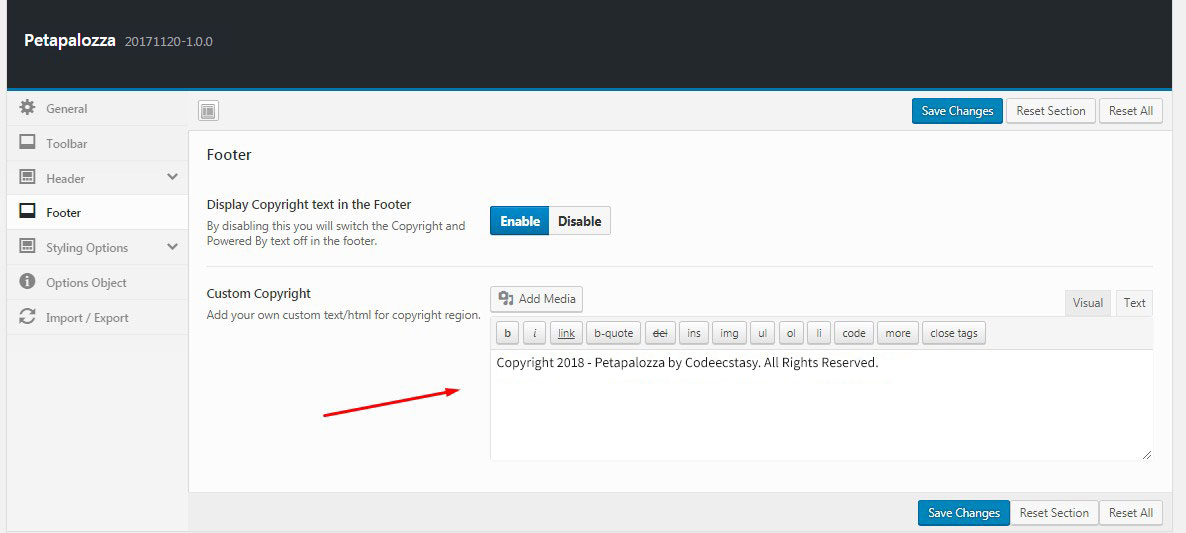
Output:

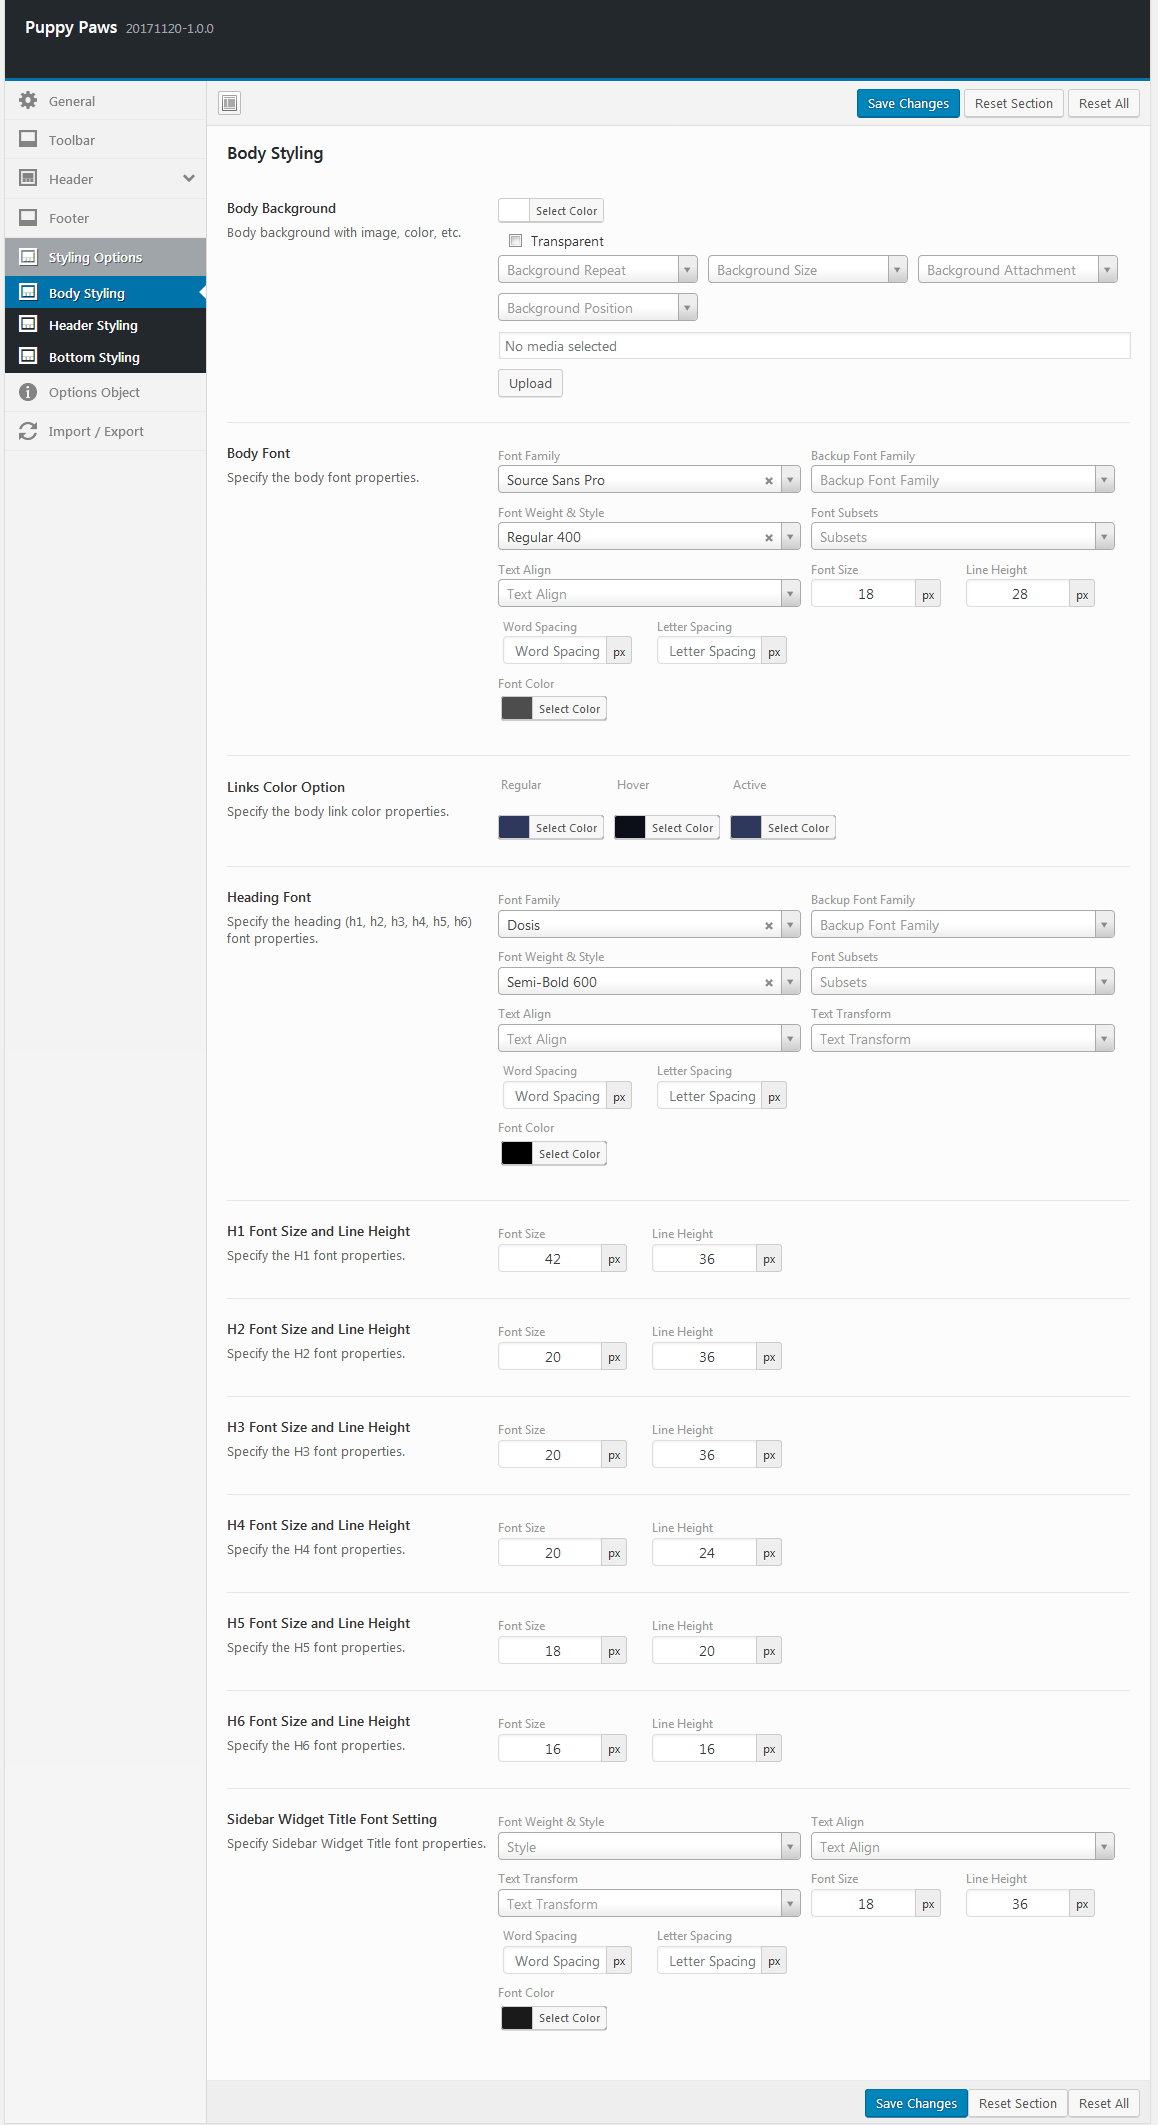
Setup theme Typography, background, Heading & Sidebar(Widget) styles:
From Admin menu, navigate to
Petapalozza Theme Options >> Styling Options >> Body Styling
tab.
You can set body background, fonts, text size, link colors according to your requirements. Also, you can manage heading(h1,h2,h3,h4,h5,h6) color and font size. You can set theme sidebar(widget) background and fonts from body styling section.
Default Header Styling:
From Admin menu, navigate to
Petapalozza Theme Options >> Styling Options >> Header Styling
tab.
You can enable/disable sticky header option from here. Also, set custom font and background color of default header and after sticky position font and background color.
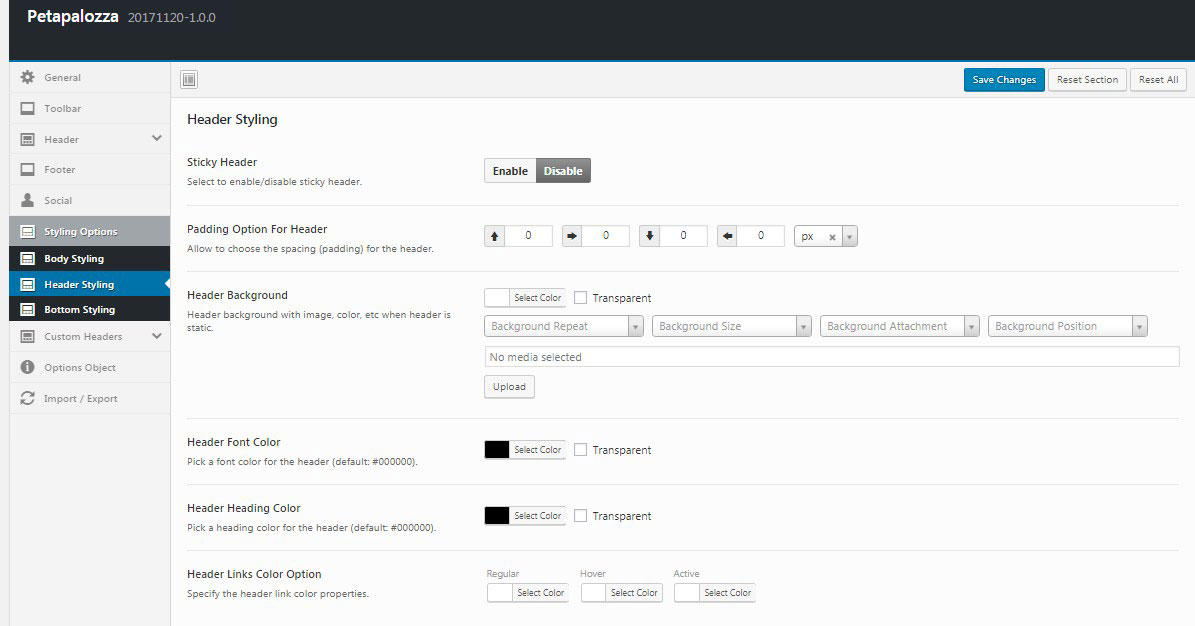
Output:

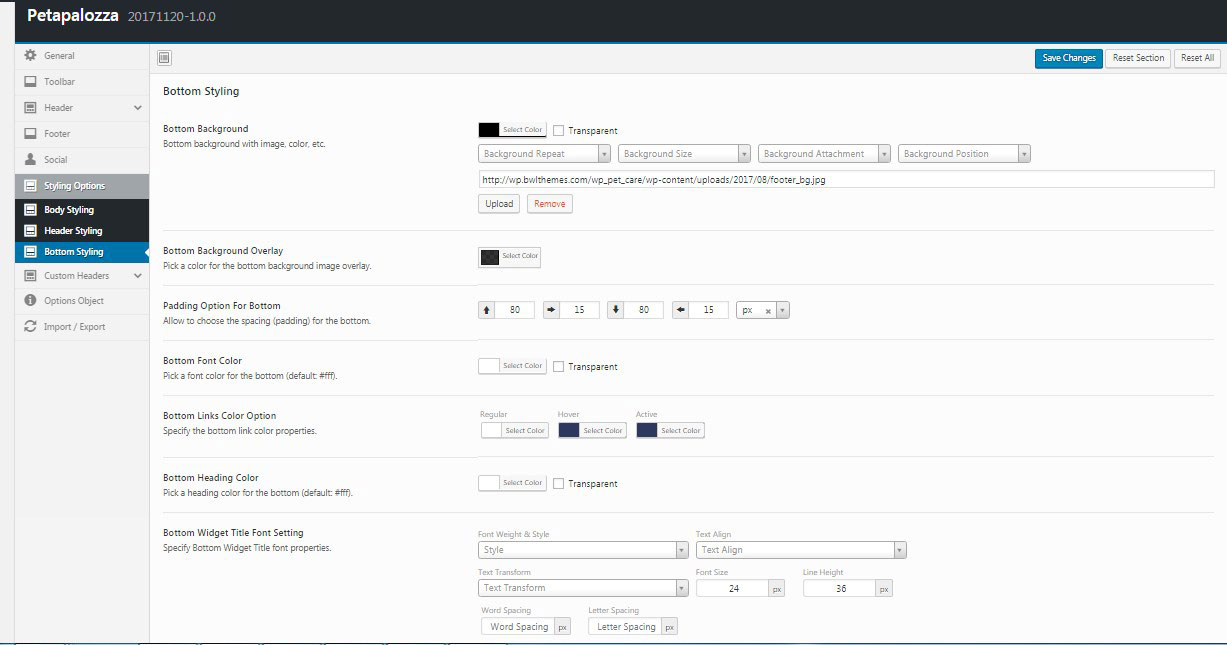
Bottom Widget Styling:
From Admin menu, navigate to
Petapalozza Theme Options >> Styling Options >> Bottom Styling
tab.
You can set custom background image and background color bottom. Also, customize bottom widget fonts and colors.
Output:

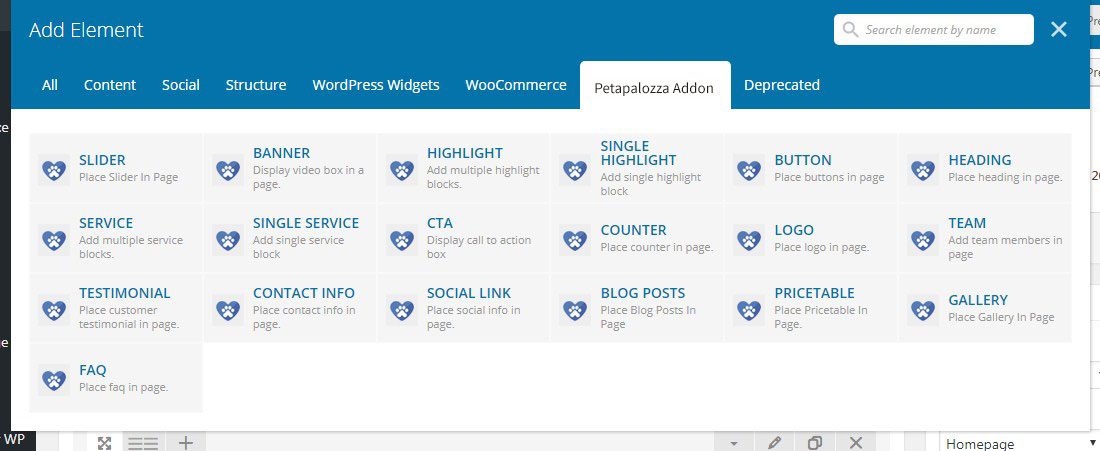
WPBakery Page Builder Elements
We have created 20 WPBakery Page Builder elements for you. You can find them in Petapalozza Addon tab in the WPBakery Page Builder.
Setup Page Content
Check the different part creation/editing process (Home, Pages- About Us, Contact Us Etc.)
The following part of the documentation consider that you already read (if not then it is strongly recommend that you read them first) the documentation of WPBakery Page Builder. It is available in the documentation folder and can able to use drag n drop page builder etc.
Home Page Layouts
Step 01: Go to Pages >> Add New from the left panel.
Step 02: Input the title Home Page 1 of the page. From the right side Page Attribute, select Homepage from the Template selection dropdown. From The right side Page Layout Settings select WPBakery Page Builder Page" to "Yes.
Step 03: Click on Backend Editor and achieve Classic Mode to achieve WPBakery Page Builder drag n drop process.
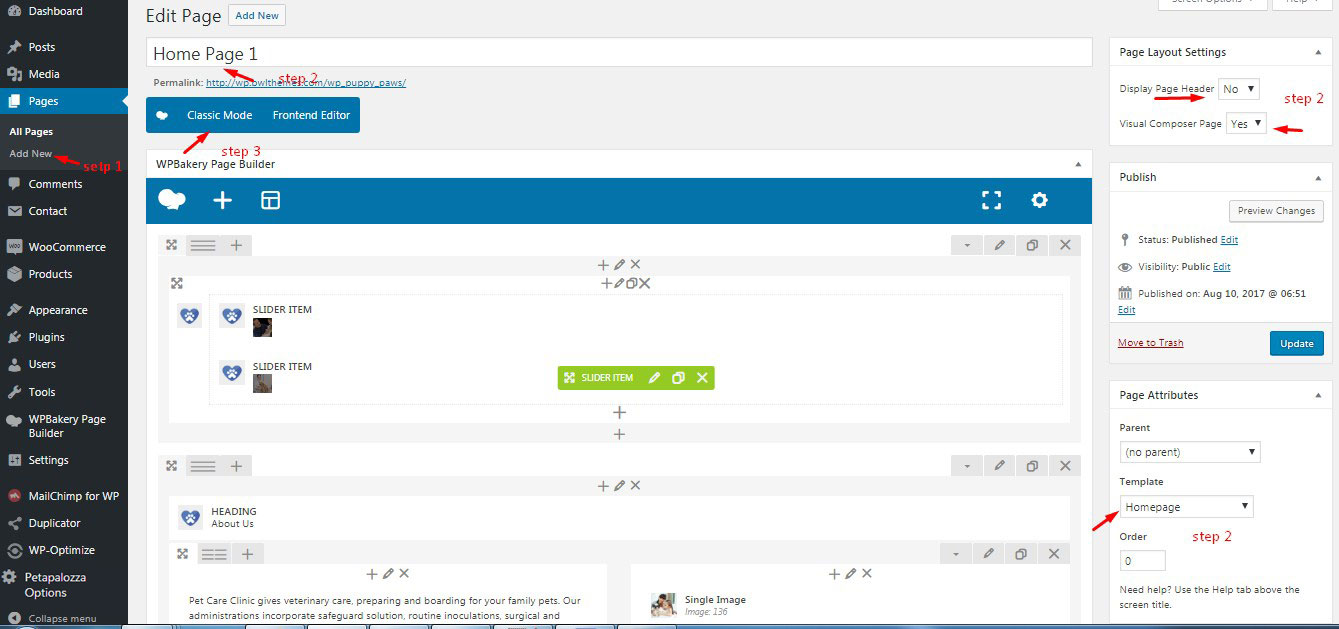
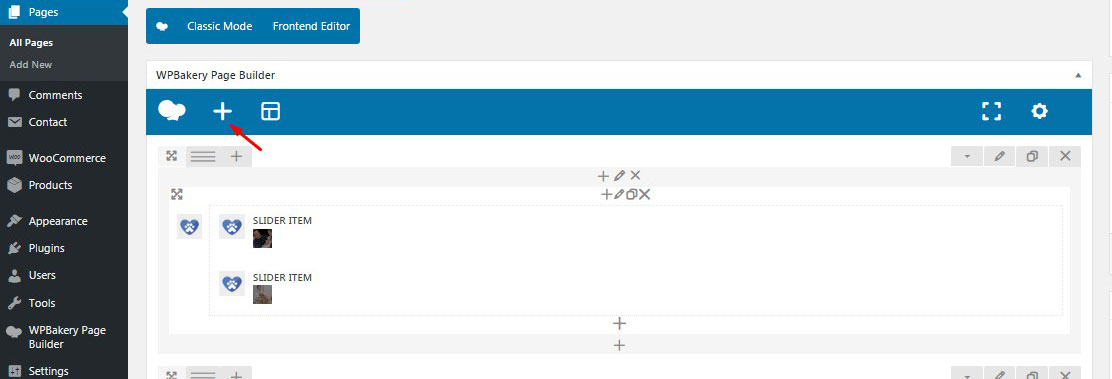
Step 04: Click on Add New Element to achieve a Row of WPBakery Page Builder.
Step 05: Inside the Row you can add different elements by drag n drop WPBakery Page Builder.
Step 06: In the One Page's different Row's we added different VC Elements Scare Button, Scare Heading, Scare Highlights, Scare Slider, Scare Team, Scare Testimonial etc. You can also add different WPBakery Page Builder elements as well in other different rows according to your needs.

Step 07: Here are the screenshot of Different Elements we used in the Home Page 1

Step 08: Here are the screenshot of Different Elements we used in the Home Page 2

About Us
Step 01: Go to Pages >> Add New from the left panel.
Step 02: Input the title About Us of the page. From the right side Page Attribute, select Home Page from the Template selection dropdown. From The right side Page Layout Settings select WPBakery Page Builder Page" to "Yes .
Step 03: Click on Backend Editor to achieve WPBakery Page Builder drag n drop process.
Step 04: Click on Add New Element to achieve a Row of WPBakery Page Builder.
Step 05: Inside the Row you can add different elements by drag n drop WPBakery Page Builder.
Step 06: We add WPBakery Page Builder Elements to achieve the about page layout, you should see WPBakery Page Builder in the Documentation Folder.
Step 07: Here are the screenshot of Different Elements we used in the About Us page.

Gallery
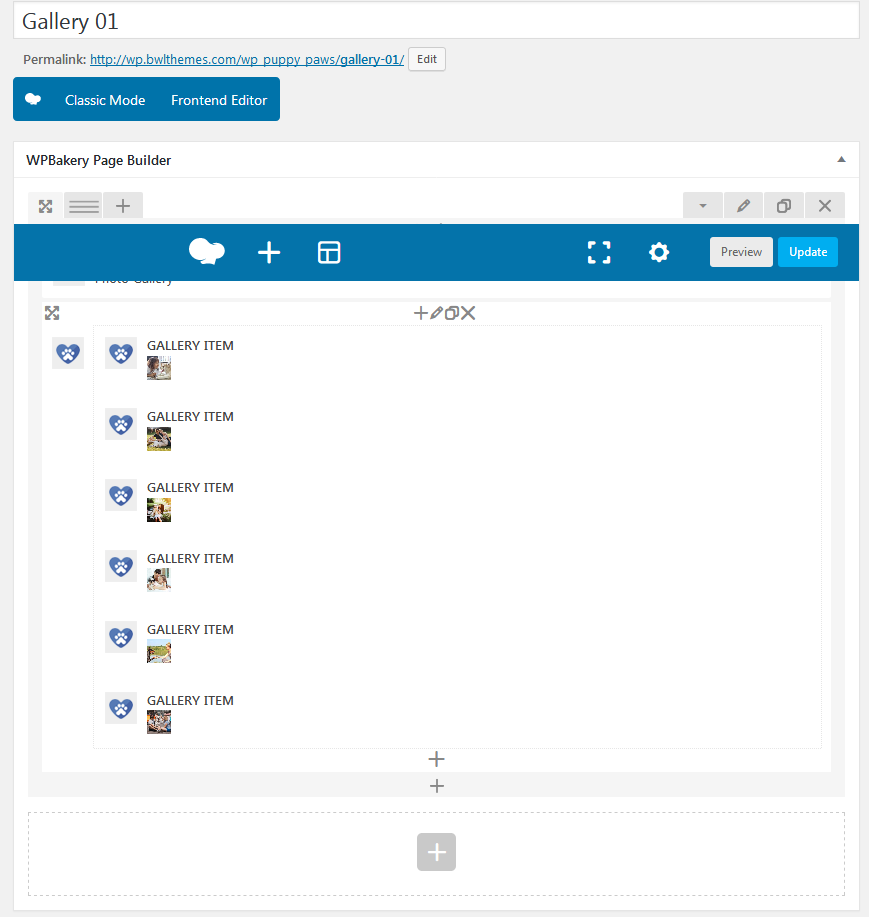
Step 01: Go to Pages > Add New from the left panel.
Step 02: Input the title "Gallery of the page. From the right side Page Attribute, select Home Page from the Template selection dropdown. From The right side Page Layout Settings select WPBakery Page Builder Page" to "Yes .
Step 03: Click on Backend Editor to achieve WPBakery Page Builder drag n drop process
Step 04: Click on Add New Element to achieve a Row of WPBakery Page Builder.
Step 05: Inside the Row you can add different elements by drag n drop WPBakery Page Builder.
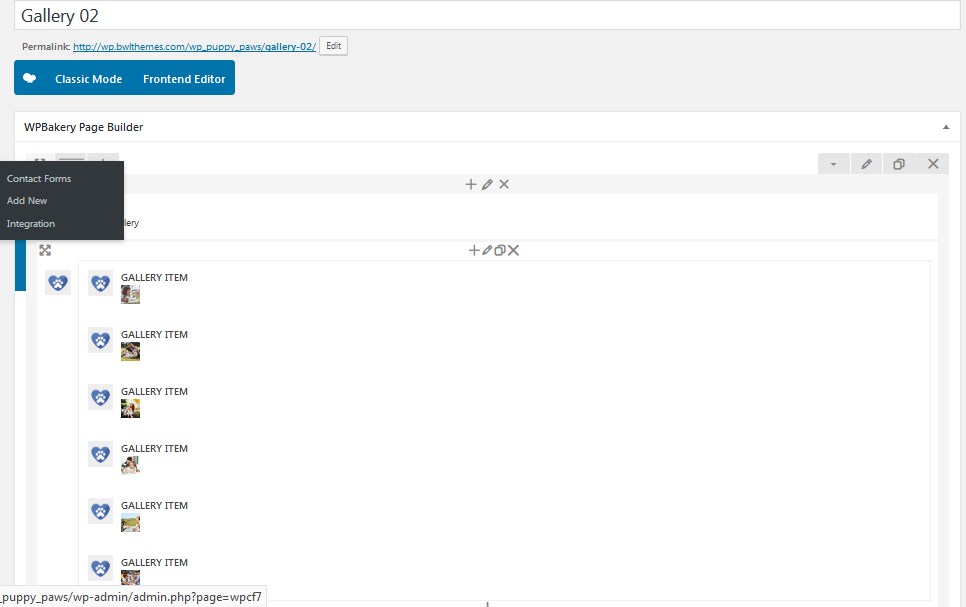
Step 06: We add WPBakery Page Builder Elements - Scare Gallery to achieve the about page layout, you should see WPBakery Page Builder in the Documentation Folder
Step 07: Here are the screenshot of Different Elements we used in the Gallery page.
Gallery Layout 01 (Simple):
Gallery Layout 02:
Contact Page
Step 01: Go to Contact >> Add New from the left panel.
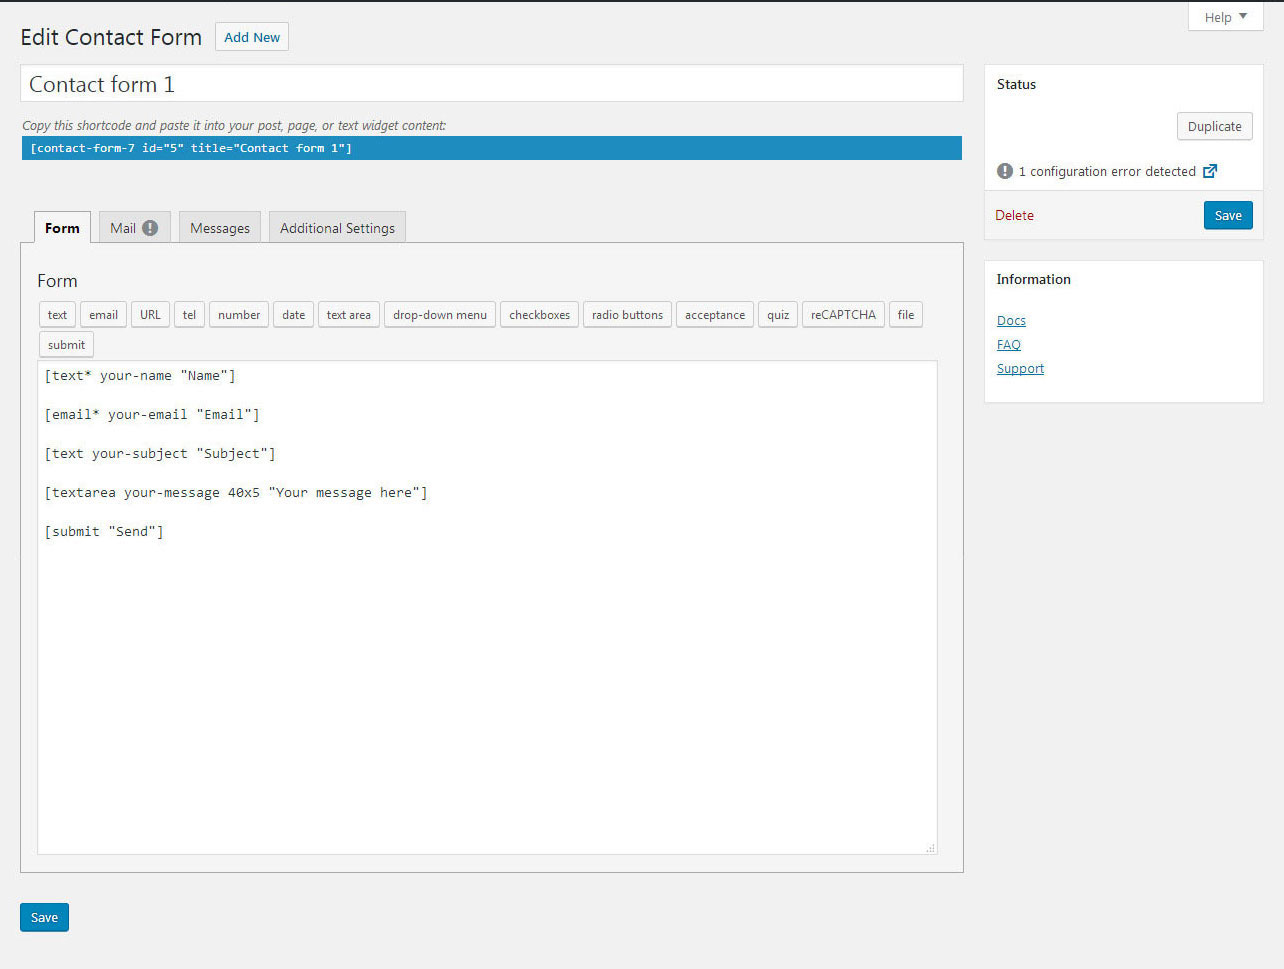
Step 02: Input the title Contact form 1 of the Contact Form and Setup the From portion of the contact from(Ex: See the following screenshot).
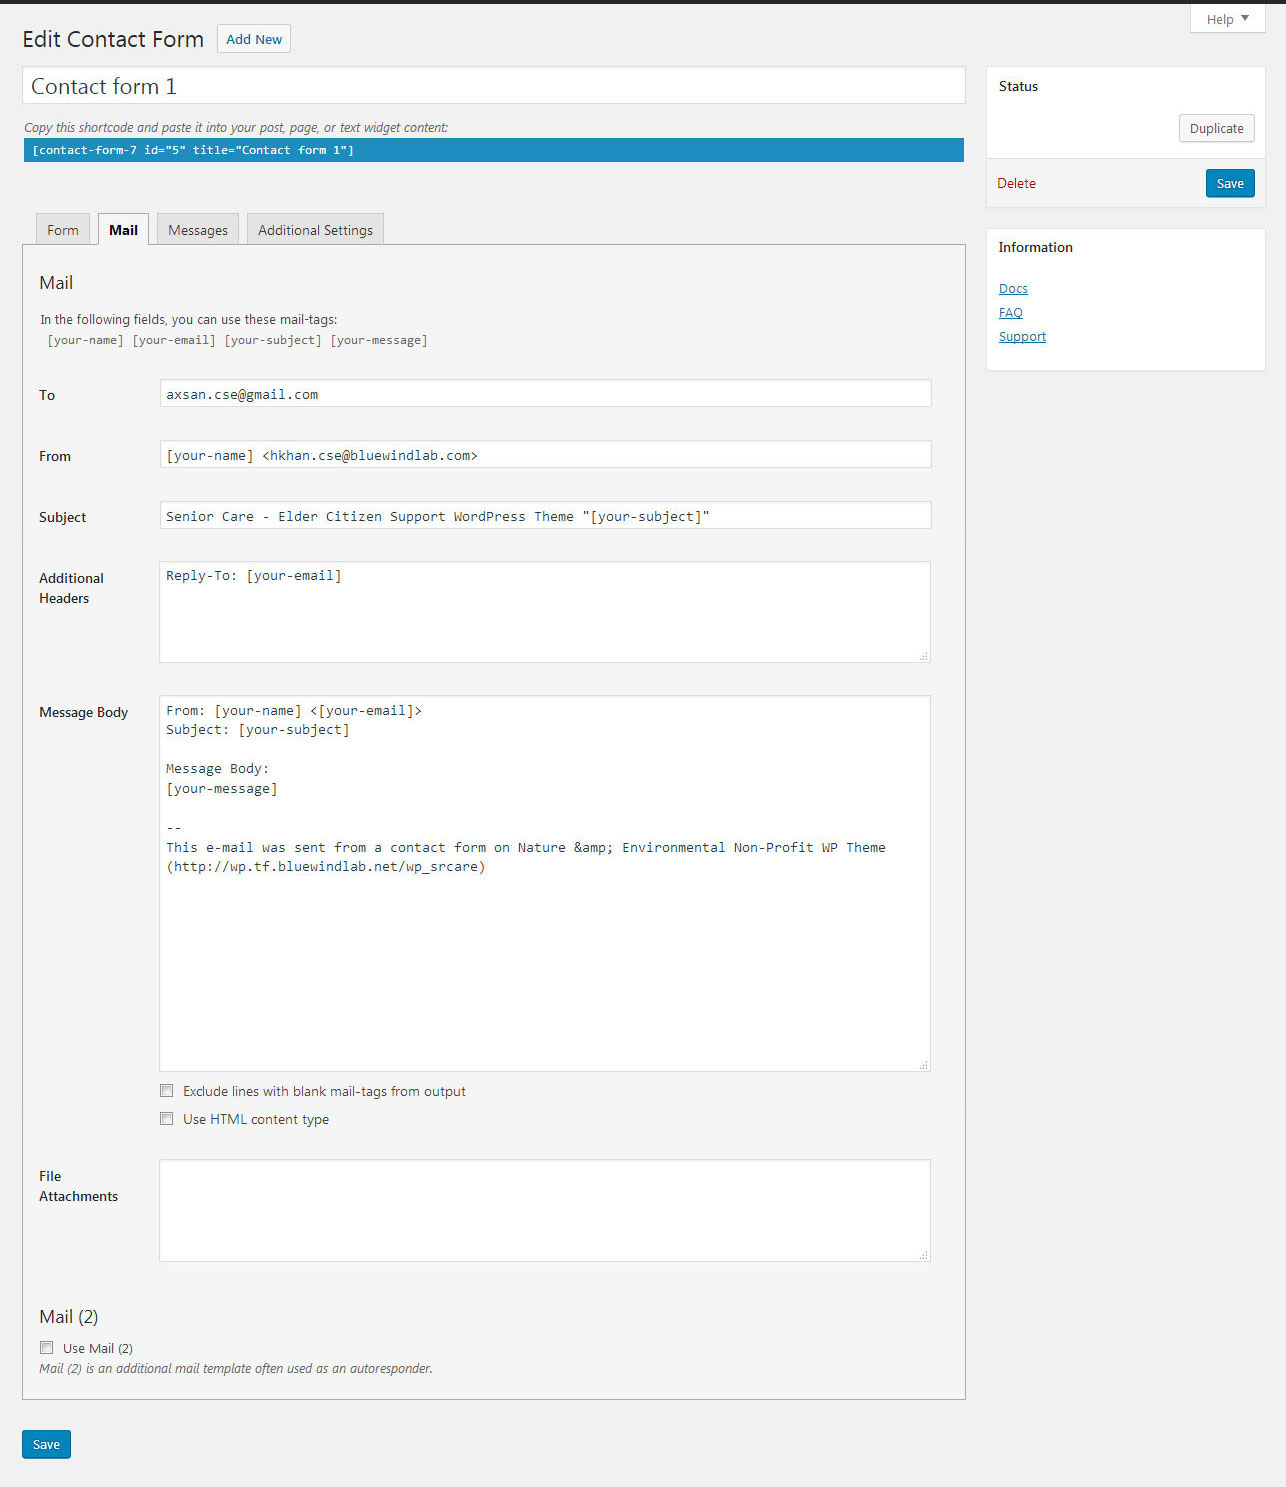
Step 03: Setup the Mail portion of the contact from (Ex: See the following screenshot)
Recommendation: https://www.youtube.com/watch?v=PV26aJ05zXM
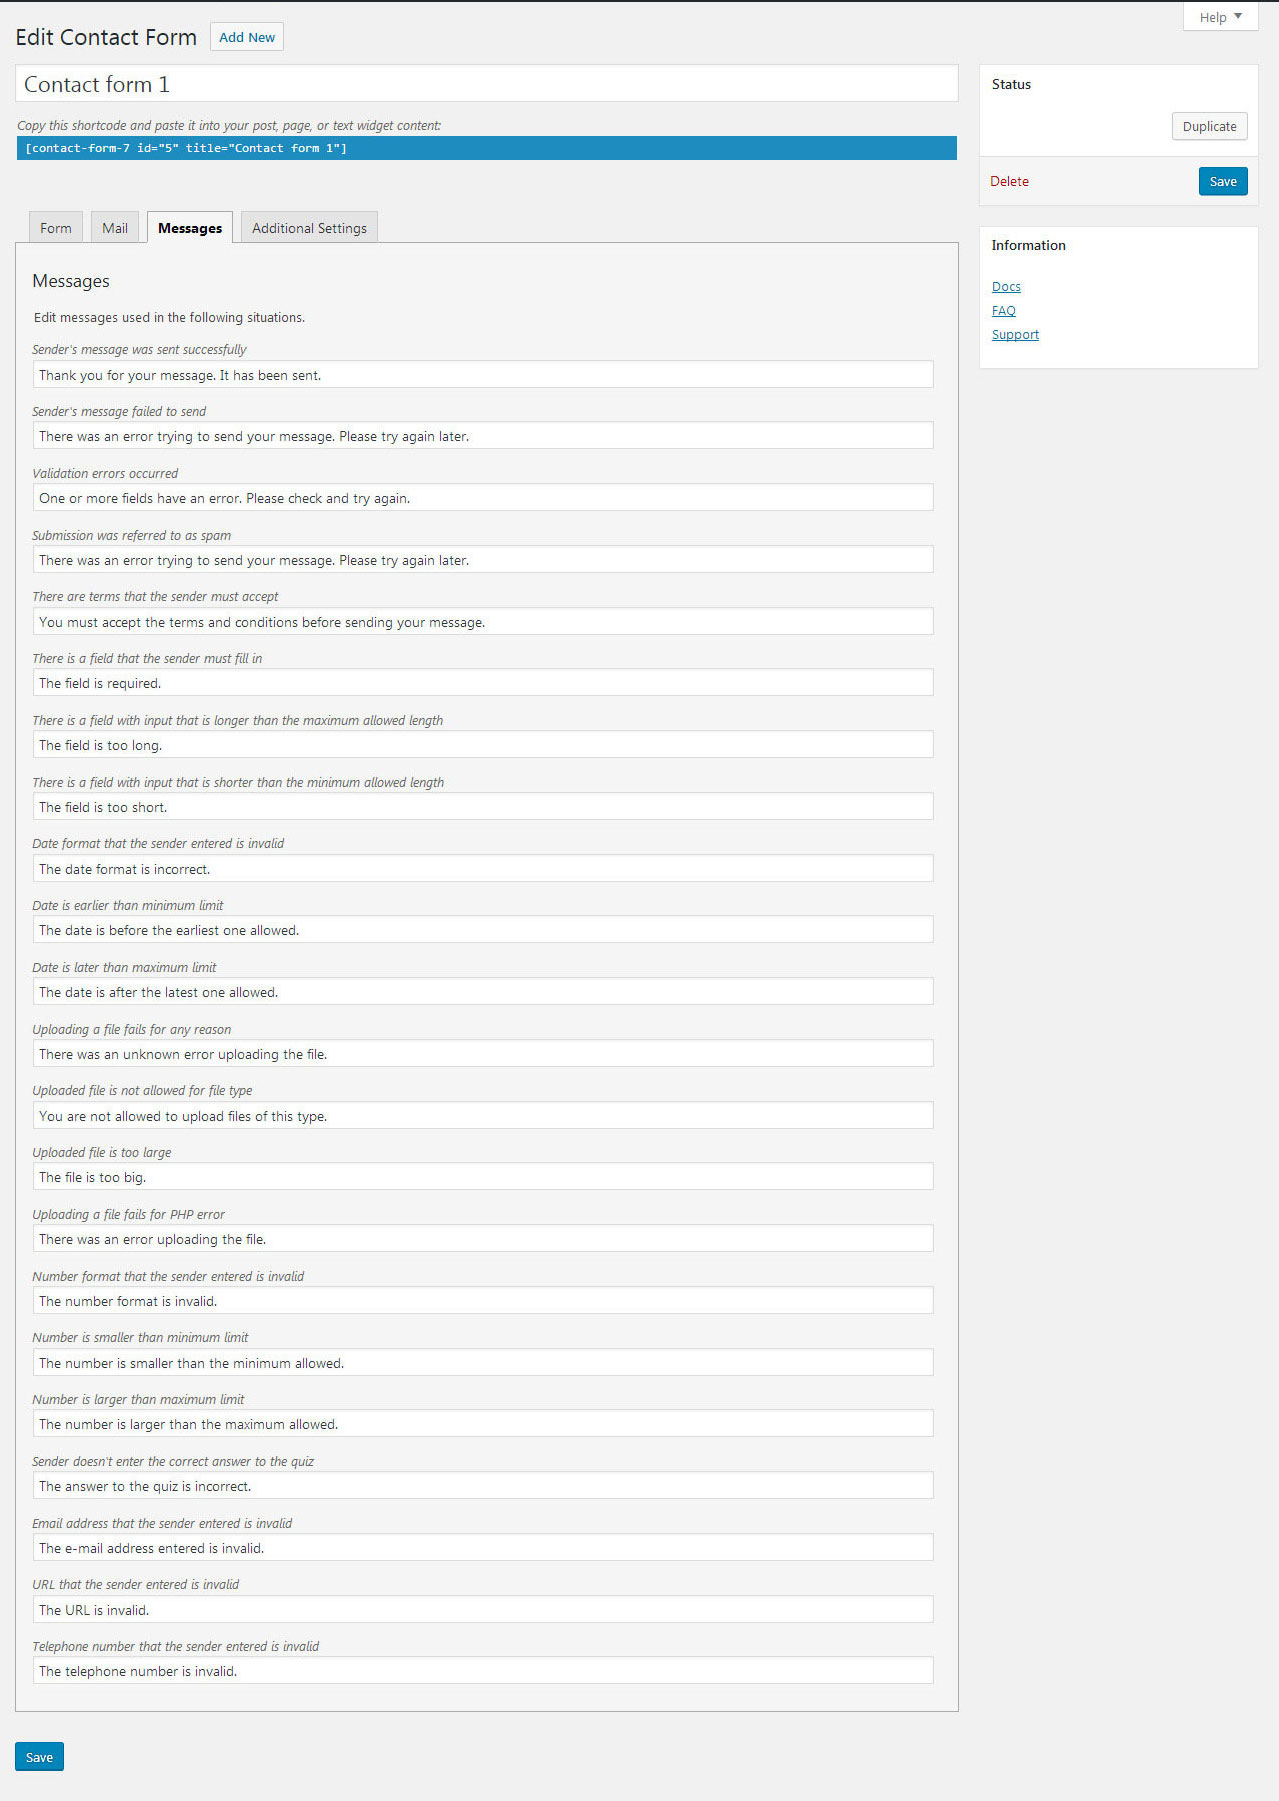
Step 04: Setup the Messages portion of the contact from (Ex: See the following screenshot)
Step 05: Click Save to save the Form and you'll get a form short code which we'll paste in a page to achieve the form output.
Step 06: Go to Pages > Add New from the left panel.
Step 07: Input the title "Contact 1 of the page. From the right side Page Attribute, select Home Page from the Template selection dropdown. From The right side Page Layout Settings select WPBakery Page Builder Page" to "Yes.
Step 08: Click on Backend Editor to achieve WPBakery Page Builder drag n drop process.
Step 09: Click on Add New Element to achieve a Row of WPBakery Page Builder.
Step 10: Inside the Row you can add different elements by drag n drop WPBakery Page Builder.
Step 11: We add WPBakery Page Builder Google Map, Info Box and Text Block Elements for this page.
Step 12: You should see the WPBakery Page BuilderDocumentation Folder.
Step 13: Setup the Google Map Elements Latitude and longitude to achieve the map.
Step 14: Paste the short code into the Text Block (Ex: like following you'll have a short code).
[contact-form-7 id="75" title="Contact form 1"]
Step 15: Here are the screen shot of Different Block Elements we used in the Contact 1 page.

Blog
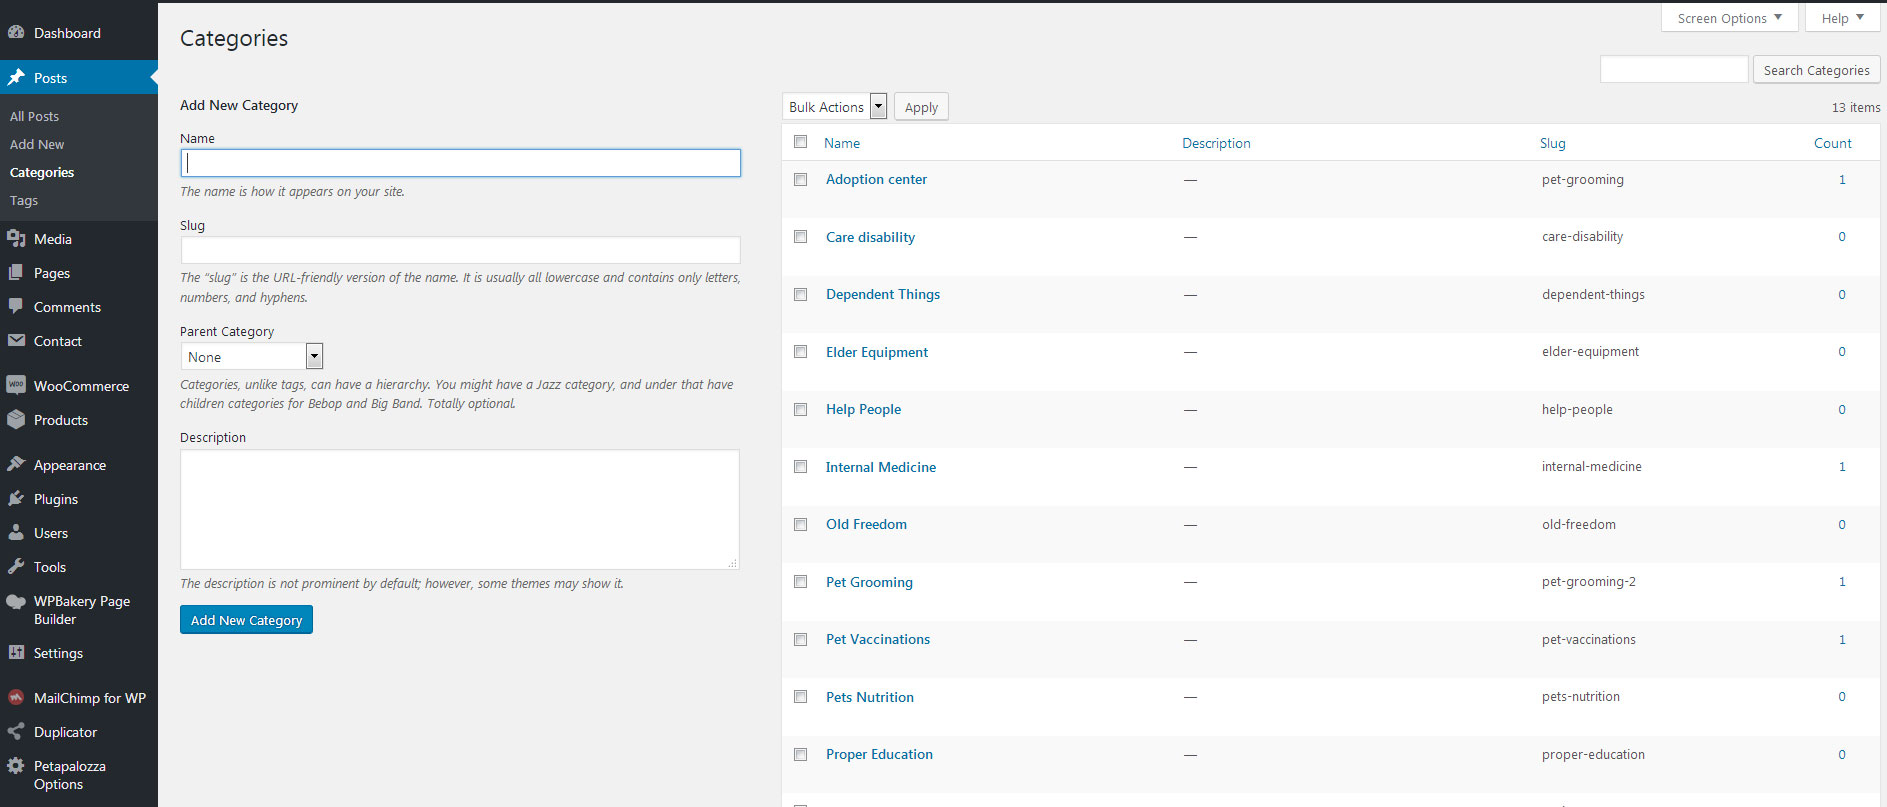
Step 01: Click on Posts >>Categories from the admin side left panel and create post Categories.
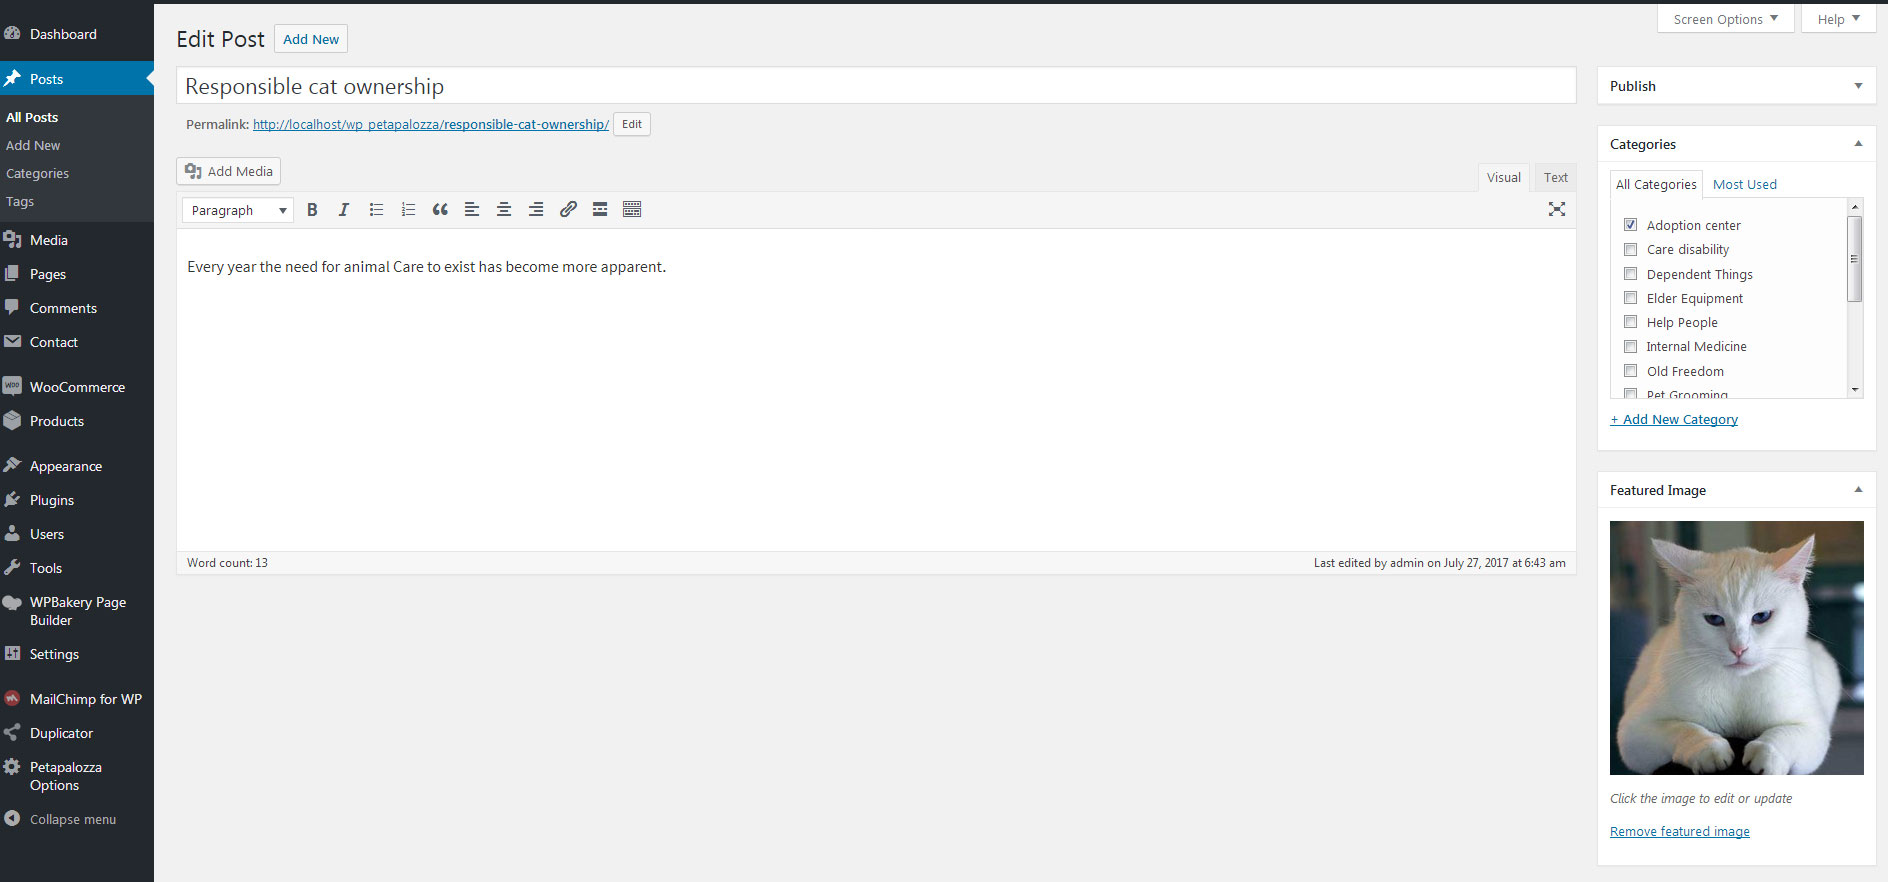
Step 02: Click on Posts >> Add New from the admin side left panel and create post under the Categories. Set the right side Petapalozza Metabox according to your needs for single post view.
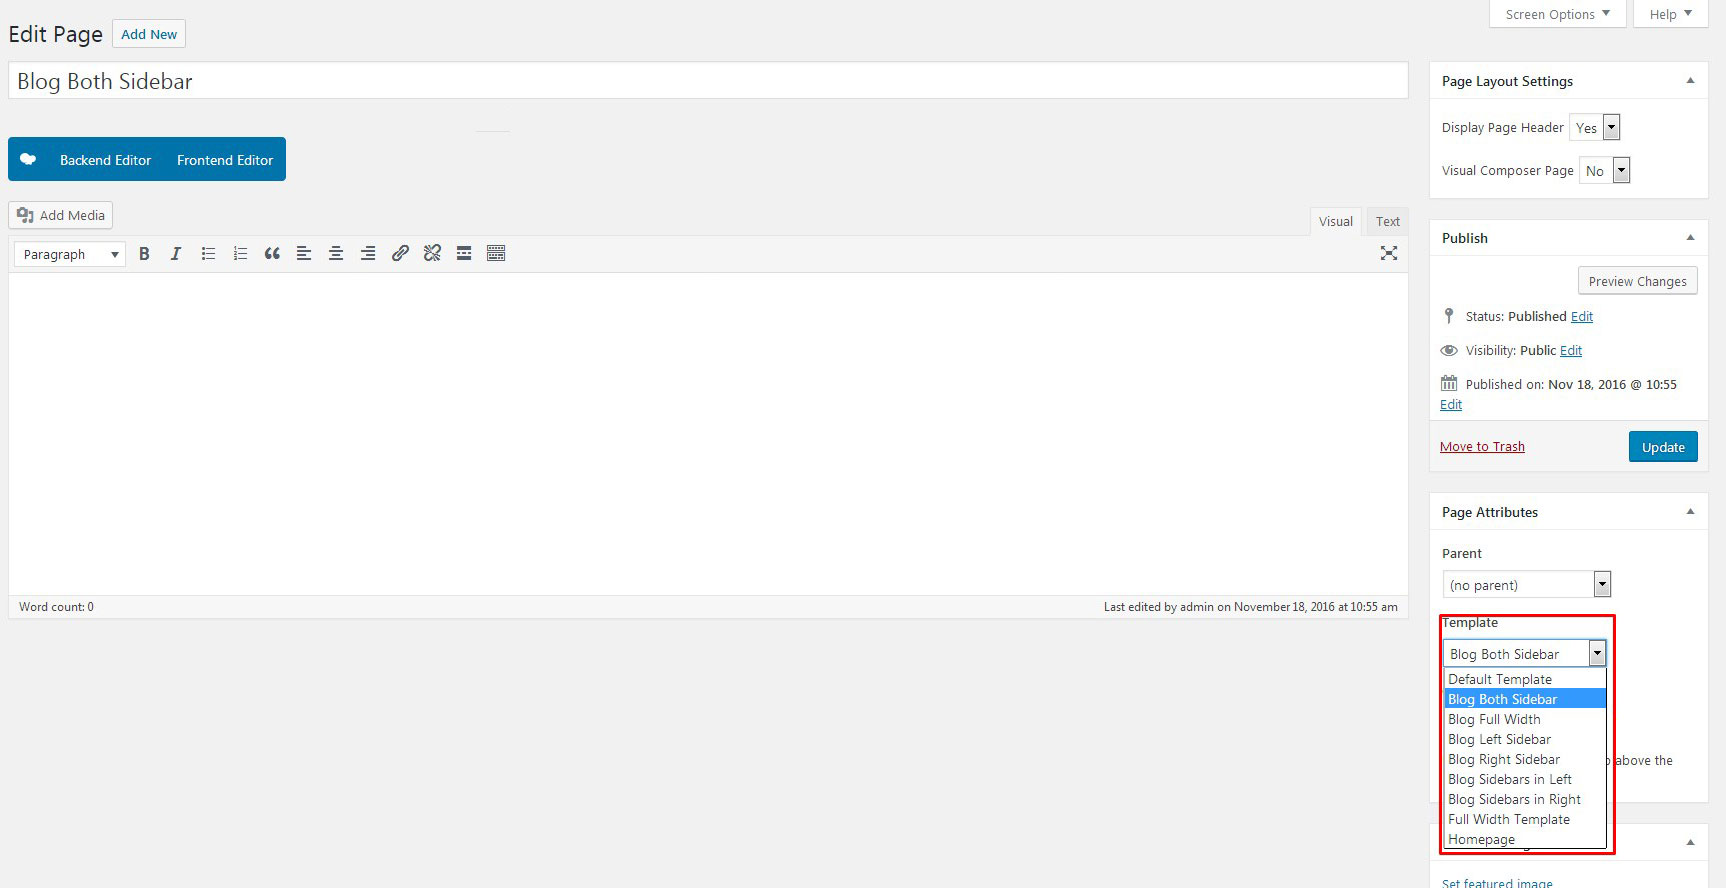
Step 03: Click on Pages>>Add New from the admin side left panel and input Page Title.
Step 04: In the right side Page Attributes set the Template to Blog Both Sidebar, Blog Full Width, Blog Left Sidebar, Blog Right Sidebar, Blog Sidebars in Left or Blog Sidebars in Right, whatever layout you want from the dropdown.
WooCommerce Store
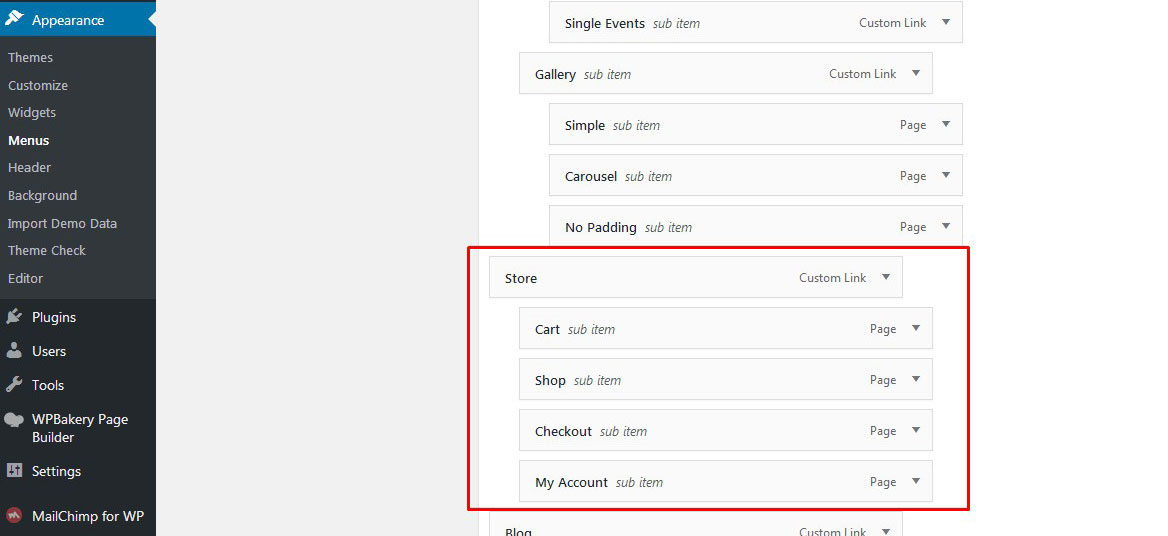
Step 01: After installing the WooCommerce plugin during the theme installation you'll have all the pages (Cart, Store, My Account, Checkout) related to WooCommerce in the left panel Appearnce >> Menu section.
Going to left panel Appearnce >> Menu add these item to the main menu
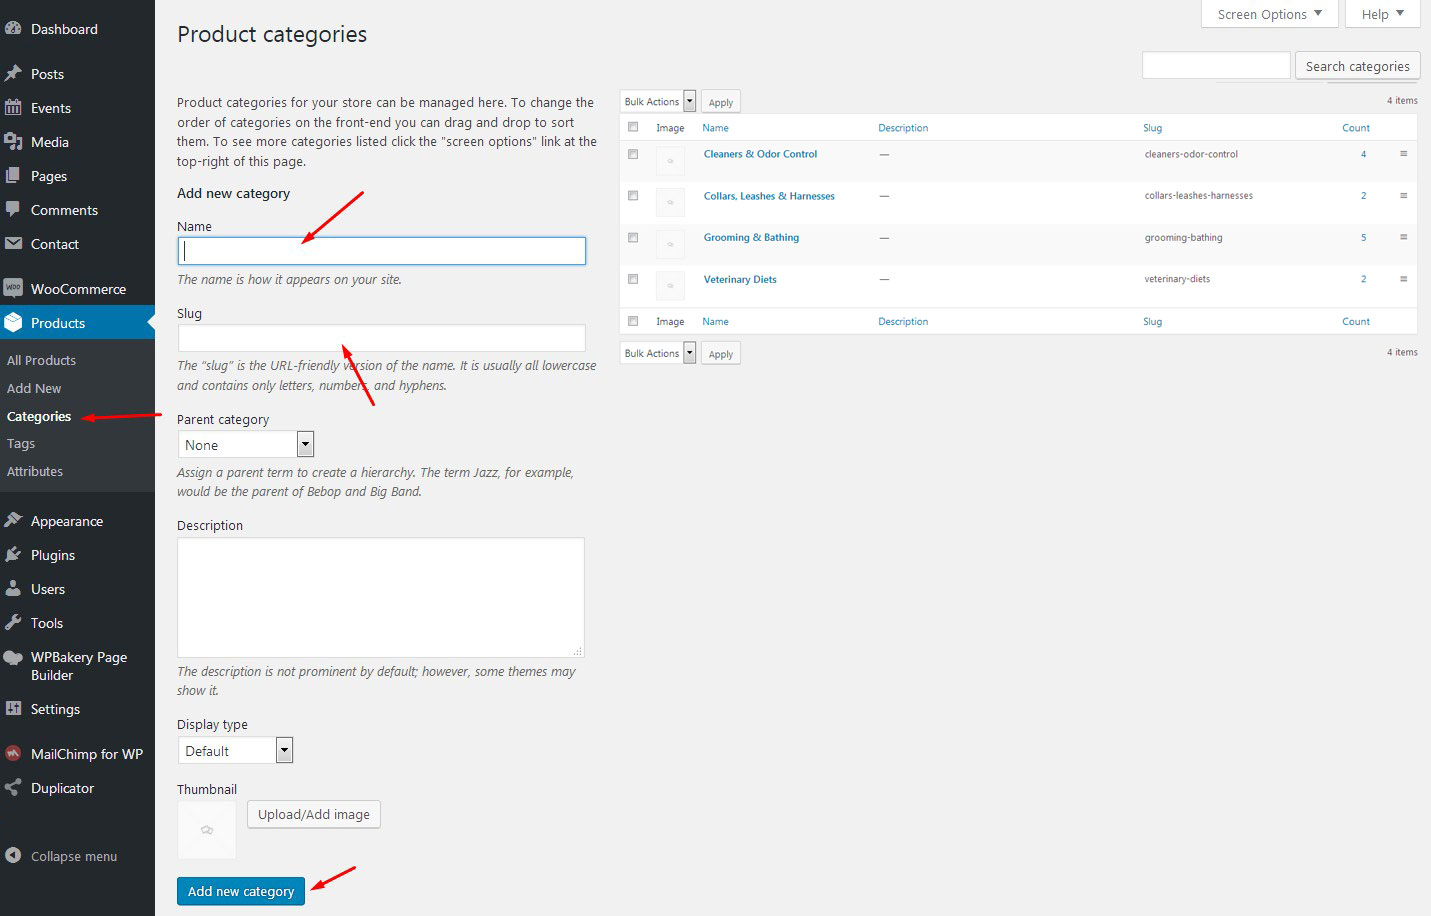
Step 02: To add a WooCommerce category go to Products >> Categories from the left panel and then add new product Category
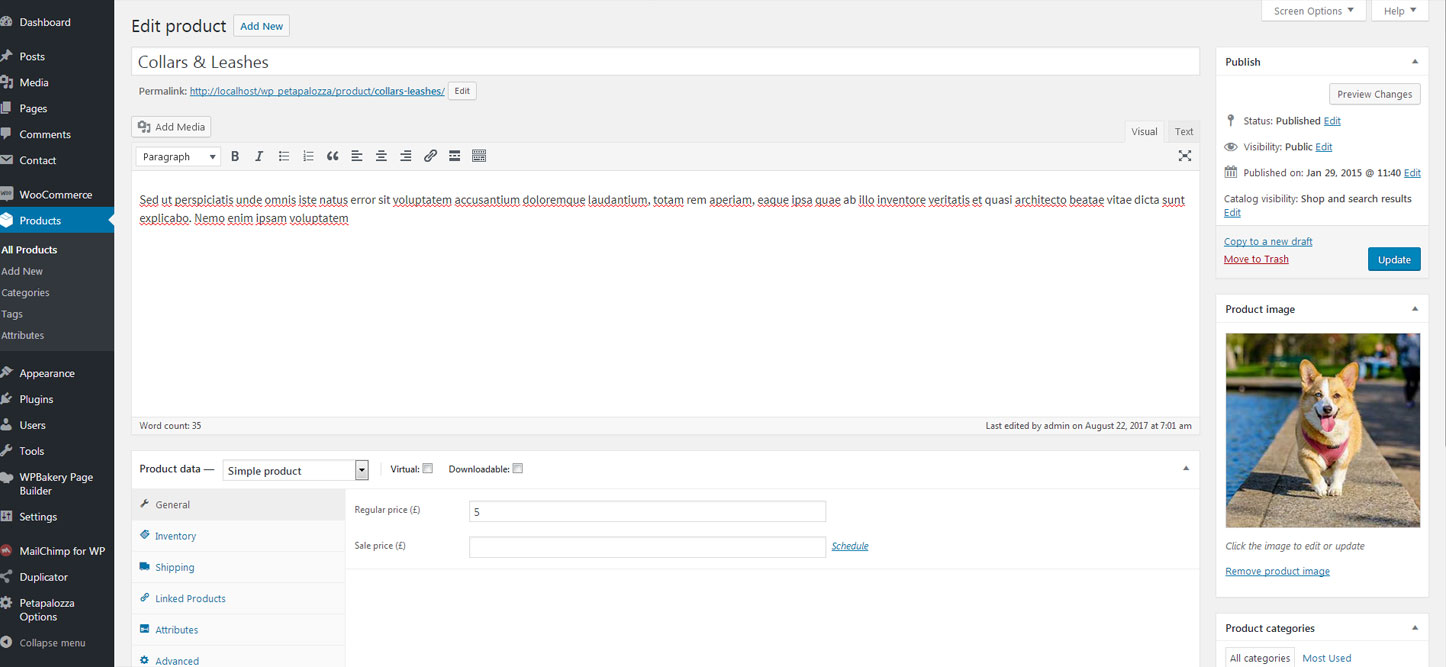
Step 03: To add a WooCommerce Products go to Products >> Add Product from the left panel and then add new products under any Categories.
Step 04: Now you should see all the added new products in the front end Store/Shop Page.
Step 05: if you want to use WooCommerce as an advance user then refer this link WooCommerce Docs , you'll have all the things as an advance user.
Menu Settings
Petapalozza Theme comes with two menu location feature. One for Primary Menu and another for Footer Menu. Let's take a look on step by step settings of two menus.
Primary Menu/Main Menu:
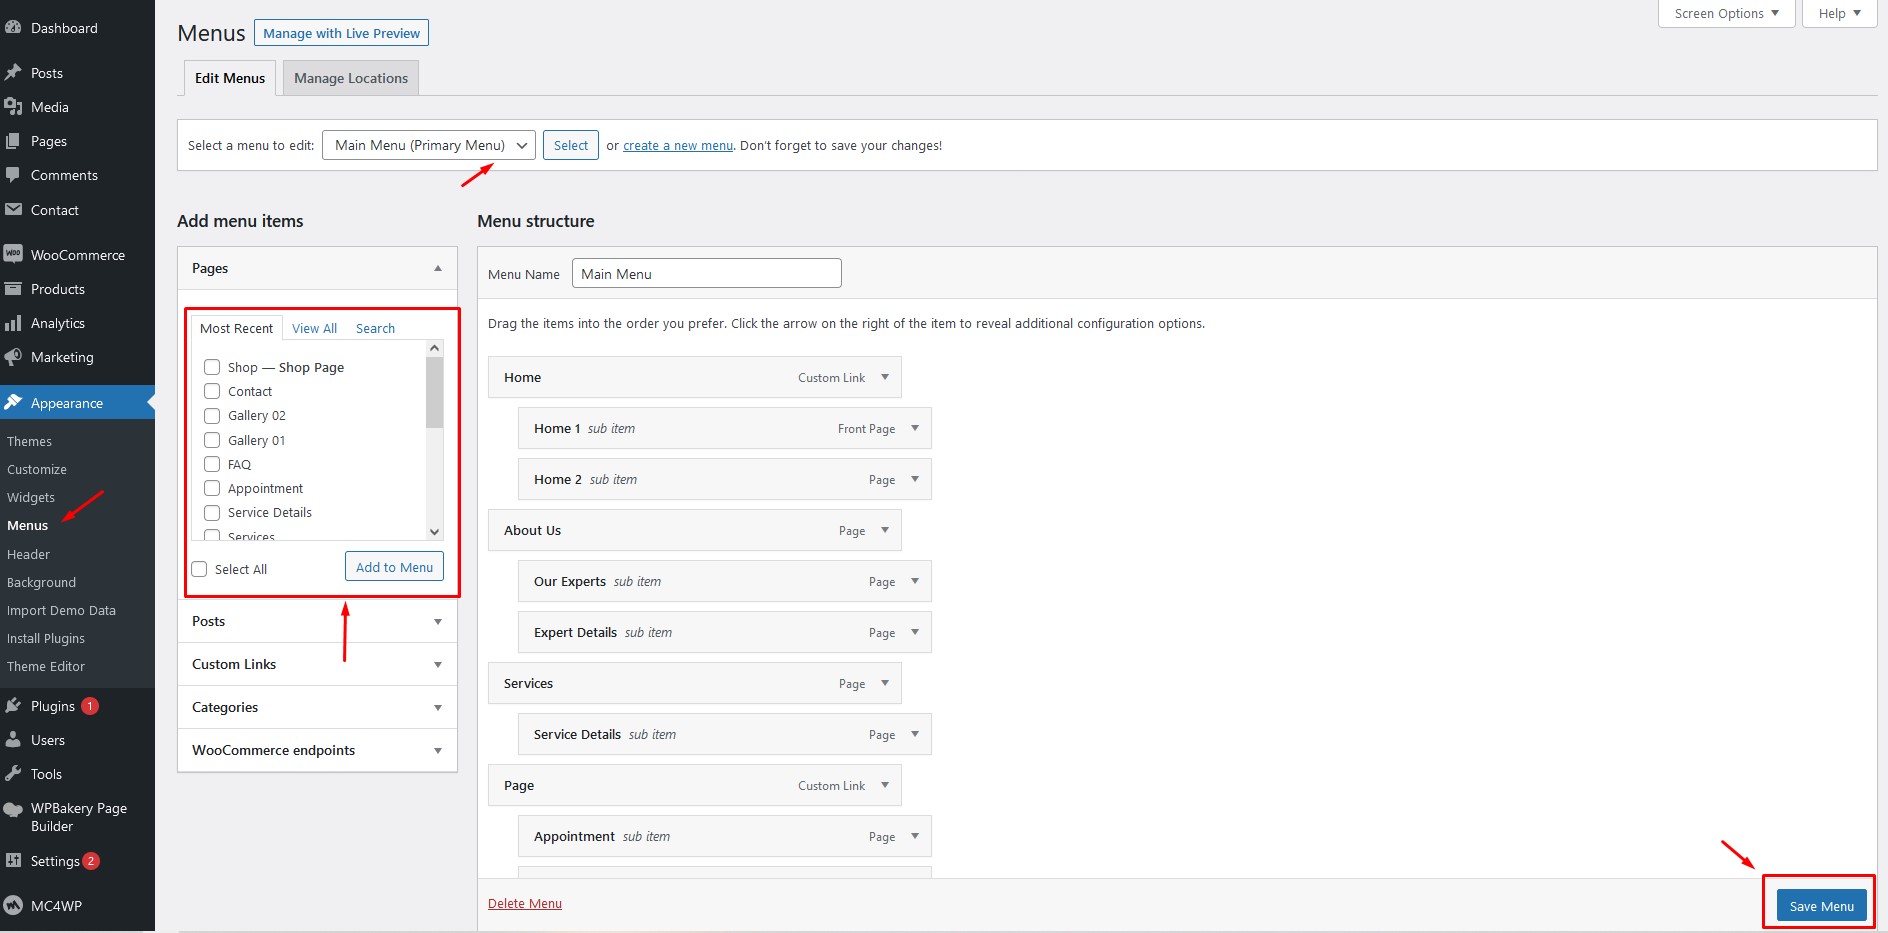
Step 01: Navigate to Appearance >> Menus . Now, select you're required menu items from 'left panel' and click 'Add to Menu' button.
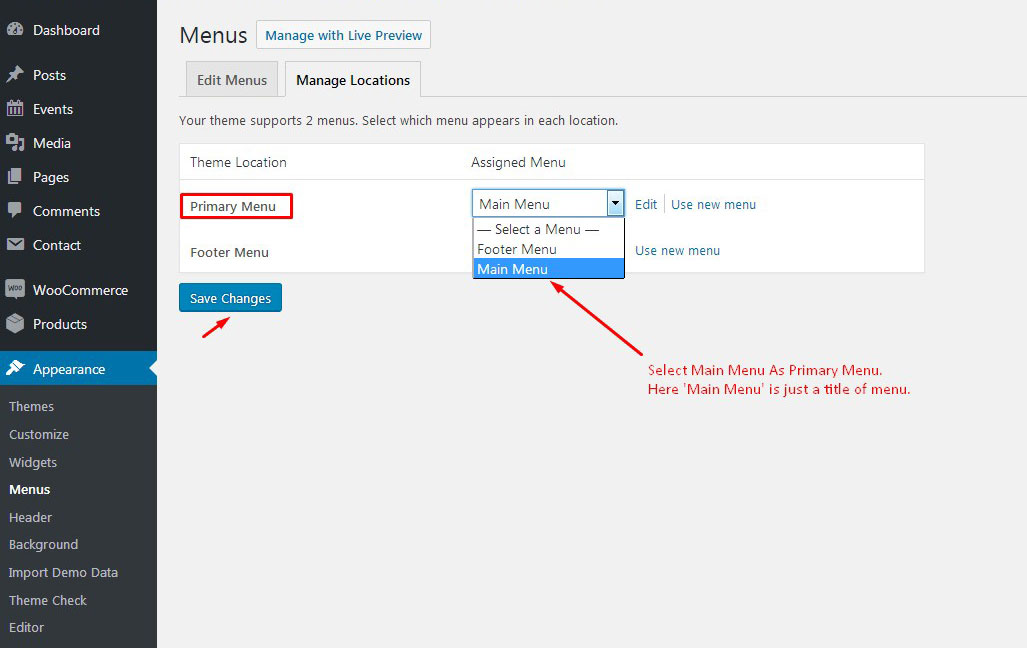
Step 02: Next, click on Manage Locations tab to set primary menu. Select 'Menu Menu' from Assigned menu column and click 'Save changes' button.
Output:

Footer Menu:
Step 01: Navigate to Appearance >> Menus . Now, select you're required menu items from 'left panel' and click 'Add to Menu' button.

Step 02: Next, click on Manage Locations tab to set footer menu. Select 'Footer Menu' from Assigned menu column and click 'Save changes' button.
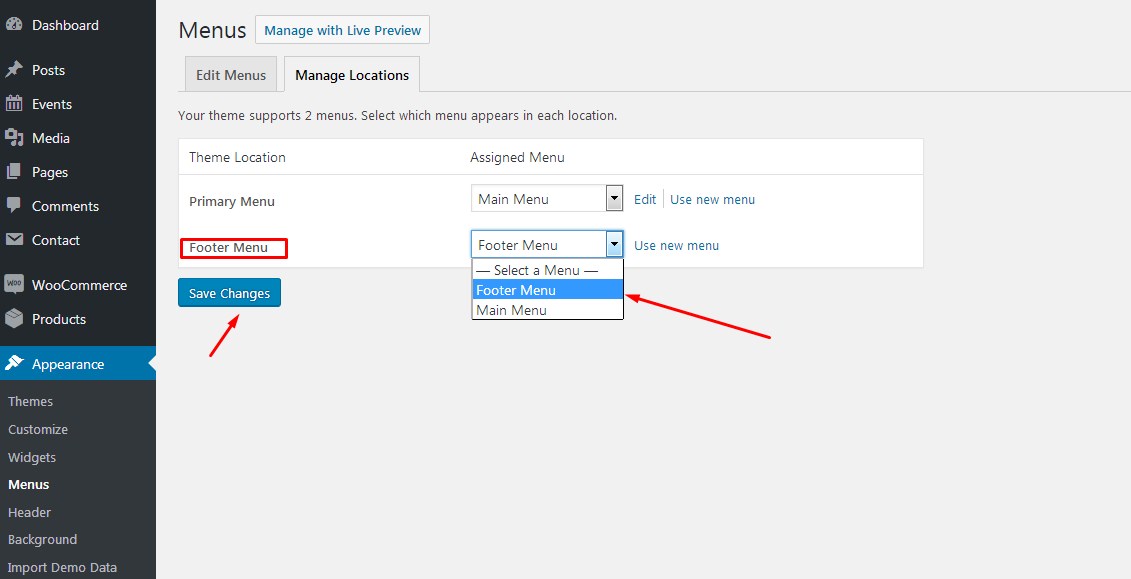
Output:

Widget Settings
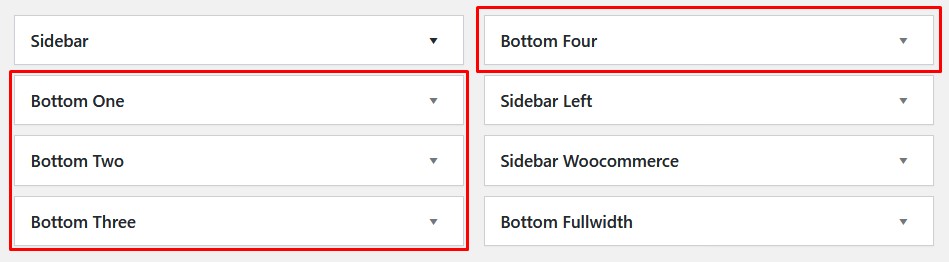
Petapalozza Theme comes with six widget areas. Two widget areas for Blog and Four for Footer.
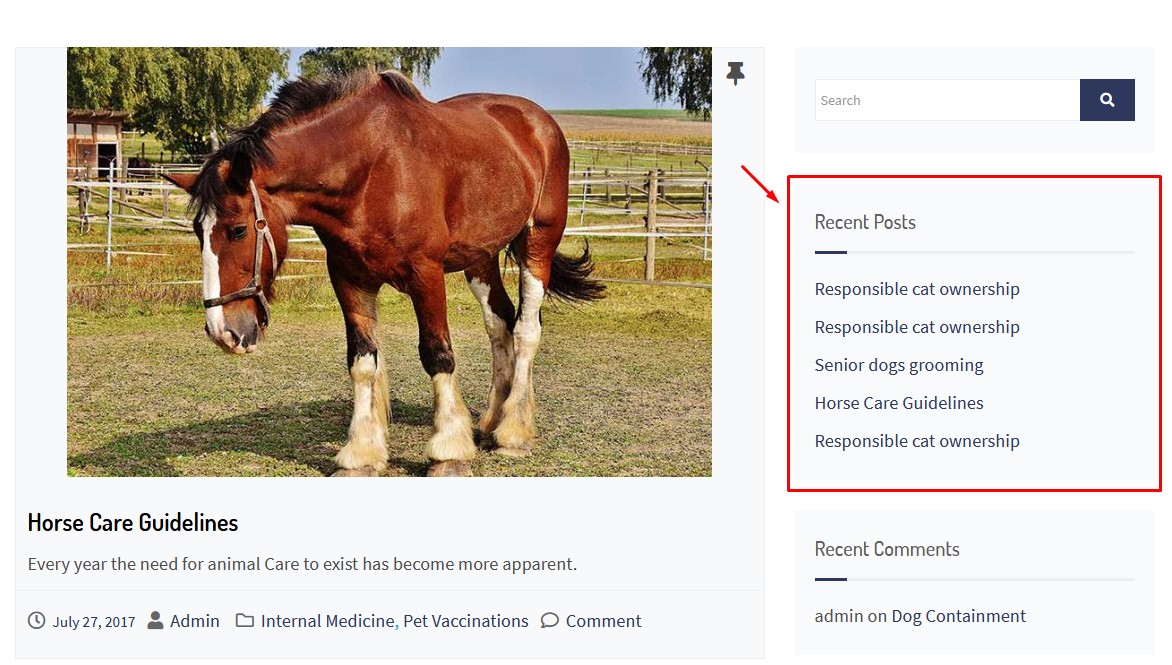
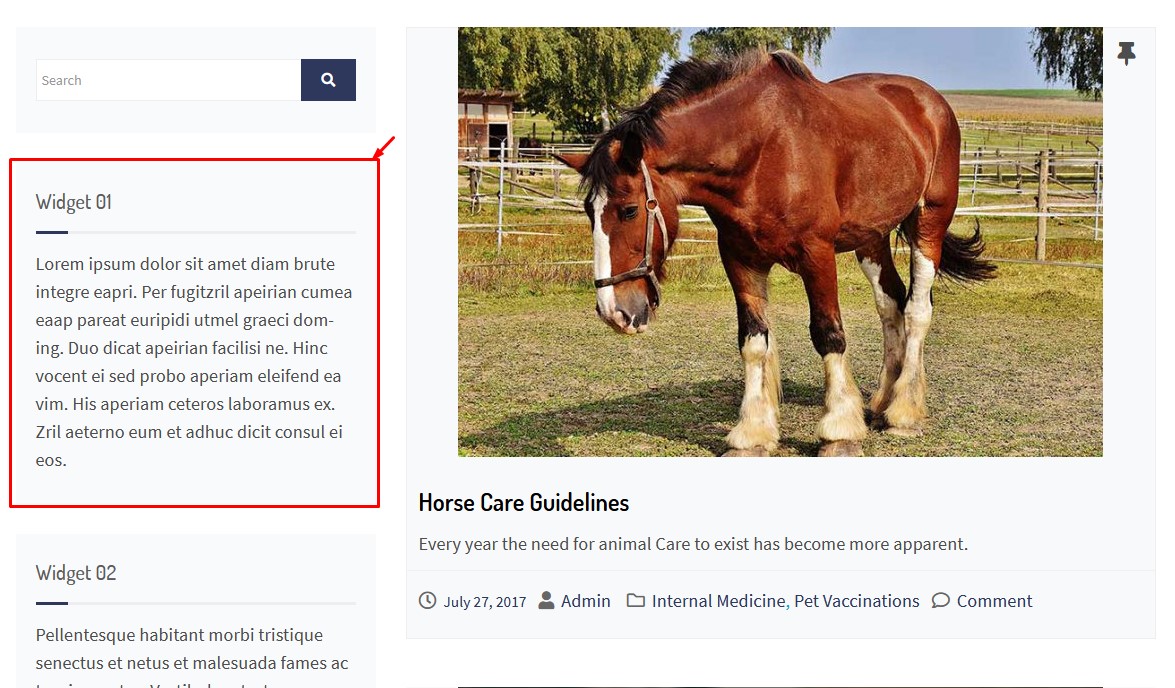
Blog (Sidebar Right) Widget
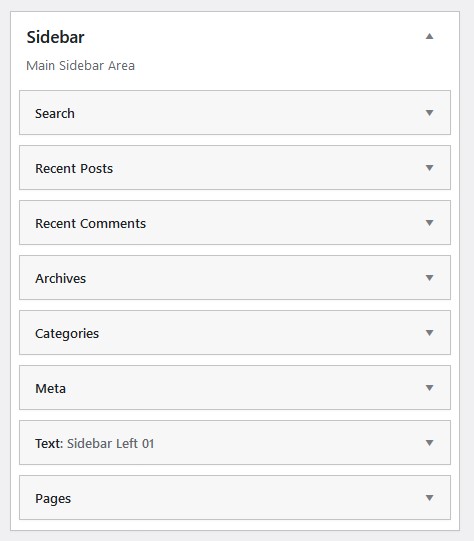
Output:
Blog (Sidebar Left) Widget
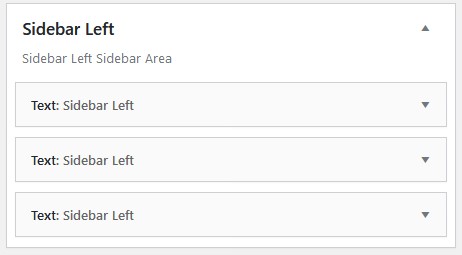
Output:
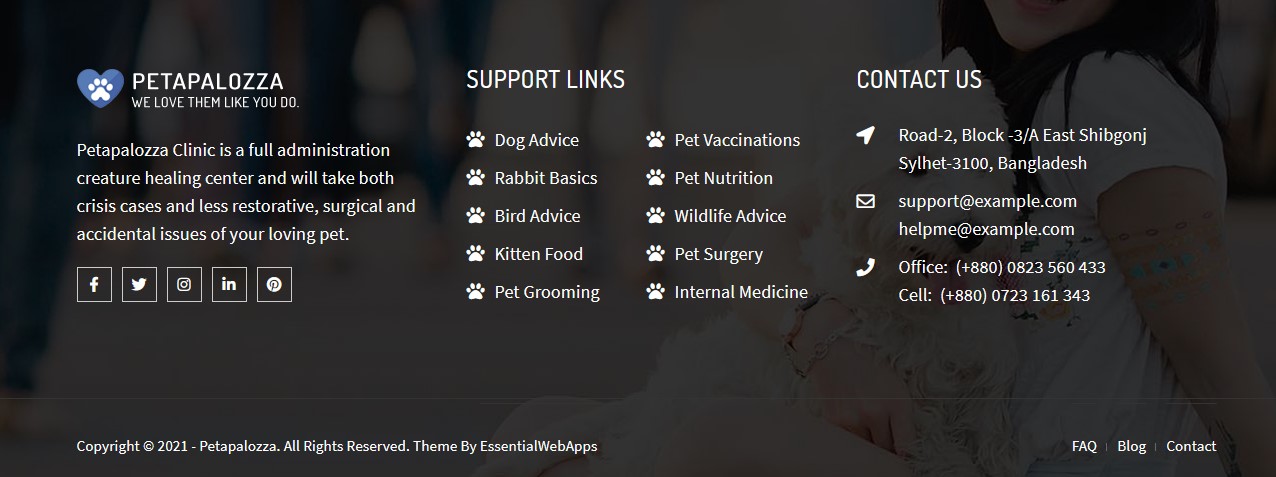
Footer Widget
Output:
WooCommerce Widget
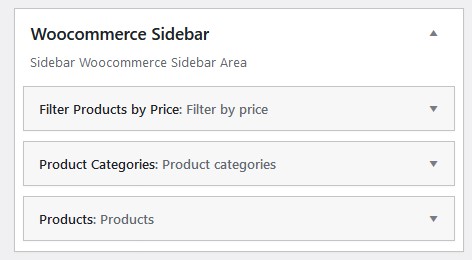
Output:

Support & Miscellaneous
Petapalozza Theme comes with six month premium support directly from the developer.
Theme Translation
"Petapalozza" WordPress theme offers cool translation feature. So, beside the English you can easily translate the theme text for other languages as well. Check following steps to translate "Petapalozza" WordPress theme.
Step 01: To translate the theme texts, please download and install Poedit software in your computer. Here goes the download link- https://poedit.net/download
Step 02: Next, navigate to /wp-content/themes/petapalozza/languages/. You will get a file named 'petapalozza.pot'.
Step 03: For example, we want to translate our theme text in to Dutch language. So, copy 'petapalozza.pot' file and rename it to 'de_De.pot'
Step 04: Now, open that newly created 'de_De.pot' file using Poedit software. You will get all the theme texts in there and you just need to add appropriate translated text in Translation box.
Step 05: Finally, save the file and you'll get 'de_De.mo' file inside languages folder.
Note:
Not sure about country and language code? Get your Country Code and Language code.
FAQ/Troubleshoot
01. "The package could not be installed. The theme is missing the style.css stylesheet.". How to fix?
Solution: You may try to upload complete zip file downloaded from themeforest. Unzip you're downloaded file and you'll get 'petapalozza.zip' file. Only upload 'petapalozza.zip' file. Issue will be solved.
02. When I attempt to install it, I received the "Are you sure you want to do this?" error message. How to fix?
Solution: It's a server execution time related issue. You can contact with your host provider to increase script execution time. There are two ways you can fix that issue.
- Way 01: Unzip theme folder & files. Then using FTP upload it in wp-content/themes folder.
- Way 02: You'll find 'plugins' folder inside 'petapalozza' theme. Which contain all the required plugins. Just bring it out from 'petapalozza' theme folder then zip the theme folder and upload it like regular WP theme.
03. How to get WPBakery Page Builder updated version?
Solution: Just send us a message via support page link. You'll send you updated version download link.
https://themeforest.net/item/pet-care-responsive-wordpress-theme/20802803
04. Can not able to install demo data? What should I do now?
Solution:
It may be server related issue. You can contact with your hosting provider or contact with us via support page. We'll be happy to assist you.
05. Getting 404 after import data? What should I do?
Solution: You need to flush your permalink settings. To do this Go to WP Admin Panel >> Settings >> Permalinks . Then click "Save" button. Now, check you're pages. Hope issue will be solved.
Upgrade Notes
To update theme you can follow the steps-
- Download Easy Theme and Plugin Upgrades plugin and install it in your site.
- Choose the theme file (e.g., petapalozza.zip) and click Install Now button.
- It will automatically install the new theme and backup the old theme and give you a link to download the backup.
- Make sure that your theme is active.
Before updating the theme, we recommend you to make backup of your modified files. Also deactivate the current version before uploading the new theme file.
We have used Senior Care WordPress theme to demonstrate the upgrade process. You can follow the same steps to upgrade this theme.
Upgrading to version 1.3.3
- Replace all files and directories in your themes/petapalozza folder.
Change Log
2023, August, 22 - v 1.2.3
- - Updated: WPBakery Page Builder to 7.0
- - Updated: Fixed the translation issue of 404 page.
- - Updated: Theme compatibility with the lastest WordPress version.
- - Updated: Theme language/translation file.
- - Updated: Theme documentation.
2023, June, 08 - v 1.2.2
- - Updated: WPBakery Page Builder to 6.13.0
- - Updated: WooCommerce product list page add to cart button.
- - Updated: Theme compatibility with the lastest WordPress version.
- - Updated: Theme language/translation file.
- - Updated: Theme documentation.
2023, January, 05 - v 1.2.1
- - Updated:Theme for WP version 6.1.1
- - Updated: WPBakery Page Builder to 6.10.0
- - Updated: Theme options panel.
- - Updated: Theme language/translation file.
- - Updated: Theme documentation.
2022, October, 17 - v 1.2.0
- - Updated: WPBakery Page Builder to 6.10.0
- - Fixed: Theme Options Panel menu position.
- - Updated: Theme language/translation file.
- - Updated: Theme documentation.
2022, May, 24 - v 1.1.9
- - Updated: WPBakery Page Builder to 6.9.0
- - Updated: Theme Options Panel.
- - Updated: Theme language/translation file.
- - Updated: Theme documentation.
2021, December, 31 - v 1.1.8
- - Updated: WPBakery Page Builder to 6.8.0
- - Updated: Theme Options Panel.
- - Updated: Theme language/translation file.
- - Updated: Theme documentation.
2021, July, 25 - v 1.1.7
- Updated: WPBakery Page Builder to 6.7.0
- Updated: Theme Options Panel.
- Updated: Theme language/translation file.
- Updated: Theme documentation.
2021, March, 17 - v 1.1.6
- Updated: WPBakery Page Builder to 6.6.0
- Updated: Petapalozza - VC Addons to 1.1.6
- Updated: Theme documentation.
2021, January, 24 - v 1.1.5
- Updated: WPBakery Page Builder to 6.5.0
- Updated: Petapalozza - VC Addons to 1.1.5
- Updated: Theme documentation.
2020, December, 02 - v 1.1.4
- Updated: WPBakery Page Builder to 6.4.2
- Updated: Petapalozza - VC Addons to 1.1.4
- Updated: Theme documentation.
2020, October, 02 - v 1.1.3
- Updated: WPBakery Page Builder to 6.4.1
- Updated: Petapalozza - VC Addons to 1.1.3
- Updated: Theme Options Panel.
- Updated: Theme documentation.
2020, May, 02 - v 1.1.2
- Added: Font-Awesome 5 Support.
- Updated: WPBakery Page Builder to 6.2
- Updated: Petapalozza - VC Addons to 1.1.2
- Updated: WooCommerce single product page featured image zoom issue.
- Updated: Theme Options Panel.
- Updated: Theme documentation.
2020, January, 25 - v 1.1.1
- Updated: WPBakery Page Builder to 6.1
- Updated: Petapalozza - VC Addons to 1.1.1
- Updated: Theme Options Panel.
- Updated: Theme documentation.
2019, August, 20 - v 1.1.0
- Updated: WPBakery Page Builder to 6.0.5
- Updated: Petapalozza - VC Addons to 1.1.0
- Updated: Theme Options Panel.
- Fixed: Back To Top button issue for mobile device.
- Improved: responsive layout for mobile device.
- Fixed: RTL Layout Issues.
- Updated: Theme documentation.
2019, May, 18 - v 1.0.9
- Updated: WPBakery Page Builder to 6.0.2
- Updated: WooCommerce Templates.
- Updated: Child theme.
- Updated: Theme documentation.
2019, February, 16 - v 1.0.8
- Updated: WPBakery Page Builder to 5.7
- Updated: Theme Options Panel.
- Updated: theme Petapalozza - VC Addons.
- Updated: Child theme.
- Updated: Theme documentation.
2019, January, 31 - v 1.0.7
- Updated: Theme Options Panel.
- Updated: theme Petapalozza - VC Addons.
- Updated: Child theme.
- Updated: Theme documentation.
2018, December, 25 - v 1.0.6
- Updated: WPBakery Page Builder to 5.6
- Updated: child theme.
- Updated: Theme documentation.
2018, November, 07 - v 1.0.5
- Updated: WPBakery Page Builder to 5.5.5
- Updated: theme Petapalozza VC Addon.
- Updated: WooCommerce Templates.
- Updated: child theme.
- Updated: Theme documentation.
2018, September, 22 - v 1.0.4
- Updated: Theme Mobile Menu.
- Updated: WPBakery Page Builder to 5.5.4
- Updated: theme Petapalozza VC Addon.
- Updated: child theme.
- Updated: Theme documentation.
2018, July, 21 - v 1.0.3
- Updated: theme Petapalozza VC Addon.
- Updated: WooCommerce Templates.
- Improved: Theme Performance.
- Updated: child theme.
- Updated: Theme documentation.
2018, April, 11 - v 1.0.2
- Updated: theme Petapalozza VC Addon.
- Fixed: Admin panel text editor issue.
- Updated: child theme.
- Updated: Theme documentation.
2018, March, 20 - v 1.0.1
- Updated: WPBakery Page Builder to 5.4.7.
- Updated: theme Petapalozza VC Addon.
- Fixed: one click demo installer issue.
- Updated: theme files to fix WooCommerce Admin notice.
- Updated: child theme.
- Updated: Theme documentation.
2018, January, 20 - v 1.0.0
- Initial release